There are always a handful of questions that come up before booking a trek like this one: is it difficult enough to need special preparation?, when is the best time to go?, what are the teahouses actually like?, and how much of the food on the trail is actually good?
Well, this section addresses all of that directly, so you have a clear and honest picture before you book this 13-day Gosaikunda-Langtang Trek.
How Do We Organize This Trip?
Before we get into the trek guide, it is worth knowing who you are trekking with and how this trip is being organized.
Langtang Valley is a subsidiary run by Altitude Himalaya Pvt. Ltd., a Kathmandu-based trekking company that has been organizing treks and tours across Nepal since 2013!
We created this website specifically to give Langtang the focused attention it deserves as one of Nepal's finest and most underrated trekking destinations.
Our team at Altitude Himalaya is young but experienced and, most importantly, very passionate about every trekking destination in Nepal. In fact, we have trekked these trails ourselves and bring to you first-hand knowledge in every itinerary we design and publish!
And here’s how we have been organizing every trek in the Langtang region:
- First of all, we are a government-licensed and registered trekking operator under Nepal Tourism Board and Trekkers' Agencies Association of Nepal (TAAN). This means we shall be organizing your trip in a completely legal way. One can check Altitude Himalaya’s company profile on the TAAN website too!
- We do include generalist licensed trekking guides but those who know the route really well! They have walked the trails multiple times and understand what each guest wants, can predict weather patterns, and make decisions instantly.
- We remain transparent about our prices. So, what you're seeing in the package is what you'll need to pay. We have clearly listed the inclusions and exclusions, and even if you have any confusion, we're happy to clarify anything before you book!
- We promise to be quick at responding and are always ready to customize your itinerary when needed. In fact, we even handle permit logistics, pre-book your accommodations, and manage all transport arrangements on a private basis (you won't have to look into any of this).
- And if you want to extend your trip, add another trek, or explore any other place in Nepal after your Langtang adventure, our team at Altitude Himalaya is always ready to help!
Difficulty Level of This Trek
Overall, this is a "difficult" level trek.
At 13 days of continuous trekking, you experience two separate high-altitude push days built into the route: one over the Laurebina/Suryakunda Pass (4,610 m) and one to either Kyanjin Ri (4,700 m) or Tsergo Ri (4,985 m). We have categorized it in the "Difficult" bracket, mainly because of the sheer number of trekking days combined with the two genuine high-altitude sections.
Still, beginners can complete it, but only with the right support, a licensed guide, a sensible pace, and proper preparation. But we would not call this a beginner-friendly trek, especially if you have not done a multi-day trek before.
Compared to the regular Langtang-Gosaikunda approach from Syaphru Bensi, where you drive straight to the trailhead and start walking from around 1,600 m, this route is a little more strenuous.
You're covering the entire Sundarijal to Chisapani to Kutumsang to Ghopte stretch on foot before you even reach Gosaikunda, and that section alone adds several extra trekking days that a Syaphru Bensi start skips entirely!
But here's the thing: with the Trishuli Corridor still under repair after the August 2026 flood, road access to Syaphru Bensi and Dhunche has been inconsistent. So honestly, walking in via Sundarijal and Helambu is the more dependable way to do this trek right now.
Some of you may look at the map and consider starting from Dupcheshwor instead, which does shave a day or so off the approach. However, it’s recommended only for those with prior high-altitude experience.
That’s because the Dupcheshwor route gains altitude too quickly for comfortable acclimatization. So, you're better off taking the longer, gentler Sundarijal-Helambu approach even if it costs you an extra day!
A few more factors push this into the “difficult” bracket are:
- The approach from Sundarijal to Ghopte is 4 days of steady, unbroken walking before your legs get a genuine rest day, so you're carrying real fatigue into the high-altitude push.
- The Ghopte to Gosaikunda day (Day 6) involves 1,180 m of elevation gain in a single 9 to 10 hour push, taking you over the 4,610 m Laurebina/Suryakunda Pass, the highest point on the entire trek.
- Depending on your choice on Day 10, you're adding either 810 m (Kyanjin Ri) or 1,110 m (Tsergo Ri) of elevation gain and loss in one day, starting from an already-high sleeping altitude of 3,890 m.
- The trek covers roughly 130 km across 9 trekking days (not counting the optional Kyanjin Ri or Tsergo Ri day), so it's demanding in terms of both stamina and altitude adaptation, not just one or the other.
- The daily walking hours average 6 to 8, with Day 4 (Chisapani to Kutumsang) and Day 6 (Ghopte to Gosaikunda) both running 7 to 10 hours depending on your pace.
- Altitude sickness becomes a real consideration from Day 5 onward, once you're sleeping above 3,000 m at Ghopte, and it stays the primary concern through the Laurebina Pass crossing on Day 6 and again on your Kyanjin Ri or Tsergo Ri day. Anyone with a history of altitude-related issues should consult a physician before booking.
Tip: If you are new to trekking, opt for a shorter Himalayan route first that will help you understand what a 13-day high-altitude trek like this actually feels like!
Best Time To Experience This Langtang Package
Like most treks in Langtang, spring and autumn are your best bet here too.
But picking the right season matters less than actually checking the weather window for the specific weeks you're travelling, especially on a route like this one that pushes you over a 4,610 m pass and holds you above 3,800 m for two nights straight!
The ultimate good weather windows for this trek are mid-October to early December and mid-April to early June. Outside of these two stretches, you're rolling the dice on visibility at Gosaikunda, snow conditions at Kyanjin Ri / Tsergo Ri, or mud on the lower Sundarijal-Helambu approach.
The Sundarijal to Ghopte stretch (Days 3 to 5) sits below 3,500 m for most of the way and is walkable in any season that keeps the trail dry underfoot.
Spring brings rhododendron blooms through the forested sections around Chisapani and Kutumsang, peaking in March and April. Autumn gives you the clearest skies for your first real mountain views once you clear Kutumsang.
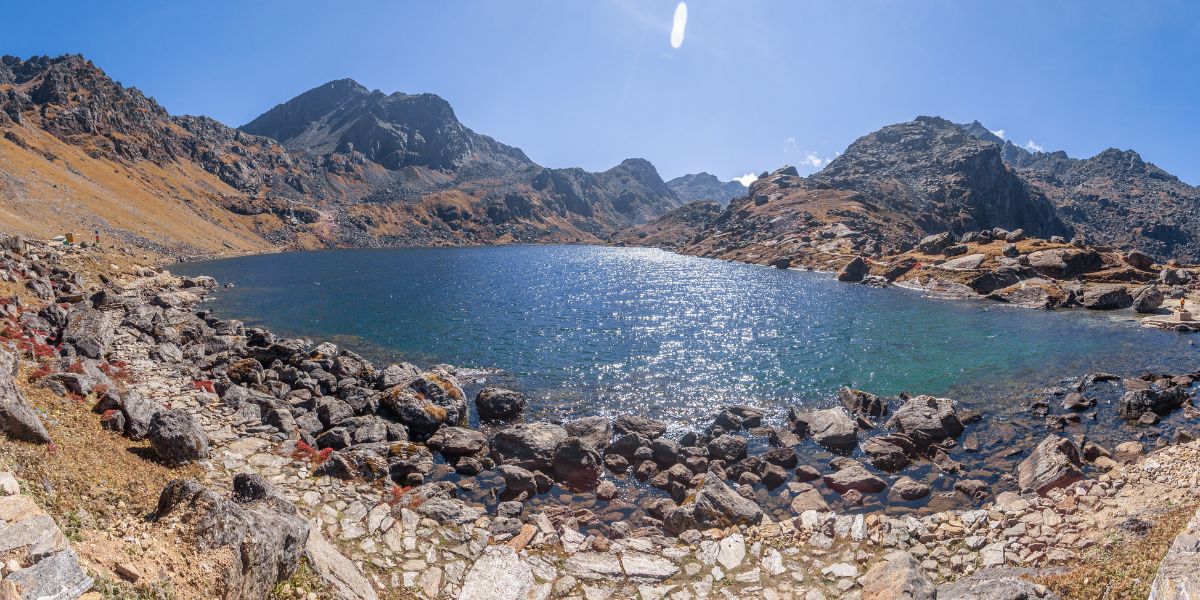
Laurebina Pass and Gosaikunda itself are where the season really starts to matter. The lake freezes from roughly December through March, which is visually striking if you catch it right, but it also means a proper holy dip is not going to happen in the cold winter months.
Outside of monsoon and winter, May to June and October to November give you Gosaikunda in its unfrozen form with the clearest skies, which is when most trekkers prefer to visit!
If you're genuinely making this trip for Gosaikunda and treating the Langtang Valley portion as secondary because you're visiting as a Hindu pilgrim, the month of Shrawan and the week of Janai Purnima are culturally the most significant times to be there.
Maha Shivaratri or any other Shiva-specific date works too. Just know that checking the weather window is still essential even for a pilgrimage visit.
Once you cross into the Langtang Valley (Thulo Syaphru through Kyanjin Gompa), visibility becomes the deciding factor again. October and November remain the peak months for mountain clarity here, and your Kyanjin Ri or Tsergo Ri day depends entirely on a clear morning.
Accommodations in This Trek: Where Will You Stay?
As mentioned in the itinerary above, your overnight stops on this journey are going to be in Kathmandu (Days 1, 2, and 12), Chisapani (Day 3), Kutumsang (Day 4), Ghopte (Day 5), Gosaikunda (Day 6), Thulo Syaphru (Day 7), Ghoda Tabela (Day 8), Kyanjin Gompa (Days 9 and 10), and Lama Hotel (Day 11).
Let's look at what to realistically expect at each of the destinations you're meant to spend the night:
- Kathmandu: We have included a 3-star property here, where you can expect a clean private room with a proper bed, hot shower, western-style toilet, WiFi, and room service. Your hotel will also store any excess luggage you do not want to take on the trek, so you get to carry only the essentials on Day 3!
- Chisapani: The lodge accommodation here has improved in recent years as it has become a more popular overnight destination for trekkers and even day hikers from Kathmandu.
- Kutumsang: The teahouse is more standard, with improved amenities, shared bathrooms, and some mobile network. The settlement is calmer and feels more settled than the higher stops. It is a reliable rest point before Chisapani.
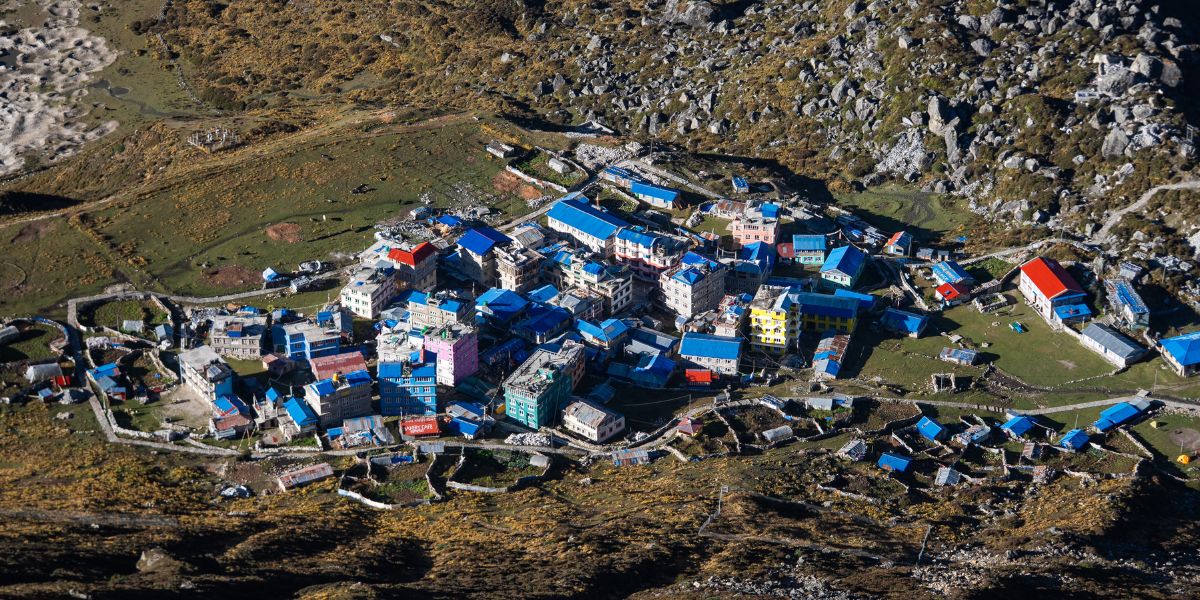
- Ghopte: This is one of the most basic stops on the entire route, with just a handful of teahouses and limited facilities. Rooms are simple (but improved over the years), often shared or dormitory-style, with hot water and mobile network available. Since you're sitting at 3,430 m and heading into the hardest day of the trek the next morning, expect a cold night.
- Gosaikunda (or Gosain Kunda): Teahouses here are community-governed, which means pricing is standardized across most facilities and is roughly equal. Expect basic rooms with shared toilets, limited hot water, and a wood-fired dining area. During Janai Purnima, these teahouses fill completely and overflow into temporary shelters, so advance planning during that period is essential. In fact, you might even require camping (which lodges provide, or if we know about such a situation, we’ll let you know).
- Thulo Syaphru: Lodges similar to Syaphru Bensi in standard, with proper beds and a common dining area. A step down from Kyanjin in terms of facilities but adequate for a rest night before the long Gosaikunda day.
- Ghoda Tabela: Teahouses here are basic but sufficient, and there are only a handful of them since this checkpoint settlement mostly caters to trekkers passing through rather than staying long. Rooms come with shared bathrooms and limited facilities. What makes the night worth it is your first proper view of the Langtang and Jugal ranges, along with the horses and mules stabled around the village.
- Kyanjin Gompa: The best of all locations, with proper bedding, an accessible mobile network, WiFi available, device charging in rooms, and in some even shared toilets! Hot showers are also available depending on the lodge (some offer them for free). And the cozy, warm dining rooms here are where the best memories you’ll have!
- Lama Hotel: Accommodation here is mostly in teahouses (no proper lodges like Langtang and Kyanjin). Also, there are just about 7-8 teahouses, so instead of pre-booking, the hosts rely more on a “first-come, first-served” policy. WiFi here is less reliable than at other stops, but WiFi cards are available for purchase (which you can get before the trek starts). Note that rooms are basic and hot showers come at a small extra charge.
Regarding mobile network coverage, an NTC SIM card (compared to Ncell) is the most reliable option along the entire trail. Its signal holds in most major stops, though it drops in gorge sections like Lama Hotel and parts of the Gosaikunda-Helambu route.
Also, the mobile network is heavily weather-dependent. So, do not rely on data connectivity.
Meals and Local Foods/Drinks to Try
Food on the Langtang trek is not just for fuel but rather a part of the experience!
And this package includes three meals a day throughout the trek, and knowing what to order and when makes a genuine difference to how your body holds up on the trail.
Meals Included in this 13-Day Package
Our Gosaikunda-Langtang package covers breakfast, lunch, and dinner for the entire duration of the trek. Meals are served at the teahouses/lodges where you stay or stop along the route:
- Breakfast options you will find: porridge, muesli, omelette, Tibetan bread with jam or vegetable curry, chapati, pancakes, and toast. Most teahouses and homestays begin serving from 6:00 AM to 7:30 AM. Order your breakfast the night before so there are no delays on early-start mornings.
- Lunch and dinner options: Dal bhat (steamed rice with lentil soup, vegetables, and pickle), fried rice, noodle soup or thukpa, chowmein, momo, and a range of local soups, including garlic soup and potato soup. Some lower teahouses (in the Langtang Valley trail) also list pasta, pizza, and spaghetti, though for energy and digestion on the trail, DAL BHAT remains the best and most reliable choice. In fact, parts of Kutumsang-Gosaikunda only come with these local options.
- Packed Lunch for Kyanjin/Tsergo Ri: There are no teahouses along the Kyanjin Ri or Tsergo Ri route, so that day’s lunch is a packed meal prepared by the teahouse staff the evening before. They wrap it in aluminium foil to keep it as warm as possible, and you need to carry it along with trail snacks. Make sure to mention any dietary preferences the night before so the kitchen can prepare accordingly.
- Meals in Kathmandu: Well, Day 1 includes no meals (you arrive and eat at your own preference). Day 2 includes breakfast at the hotel before the Kathmandu sightseeing tour. On Day 12, a traditional cultural dinner is included, which is one of the highlights of the final evening! The final day, Day 13 only comes with a breakfast at the hotel itself.
Note: The options in the Gosaikunda region are much more limited than what you’ll find in Langtang Valley. So, don’t expect much in terms of meals in the second part of the trek.
Local Foods and Drinks Worth Trying
Beyond the standard menu, the Sundarijal-Gosaikunda-Langtang trail has a few things you should specifically seek out:
- Garlic Soup: Order this whenever you are feeling the altitude or starting to feel a headache coming on. Garlic contains allicin, a compound that supports blood circulation and oxygen delivery, which makes it a genuinely useful high-altitude remedy beyond just being a warm, savory soup.
- Sea Buckthorn Juice: You will start seeing boards advertising this around the Ghoda Tabela area. The juice is pressed from the sea buckthorn berry, a Himalayan superfruit rich in vitamins C, A, K, and E. Locals drink it to boost immunity and combat altitude effects. The taste is sharp and citrusy, and after a long uphill stretch, it is exactly what your body wants! Also, this juice is known to aid digestion and contains anti-inflammatory properties that can seriously help with muscle recovery.
- Tibetan Bread: This is a staple breakfast in the Himalayas, made of fried flour dough. It’s chewy and rich in carbohydrates, and you should pair the bread with vegetable curry or jam.
- Yak Cheese (from Kyanjin Gompa and Chandanbari): Made at the local cheese factories, this is one of the most unique food experiences along the route. Try it fresh or in a sandwich at one of the teahouses.
- Churpi: This is the hard, dried cheese that comes in two forms: a softer fresh version and an extremely hard dried version that can be chewed slowly over hours like a snack on the trail. You will find it sold in small pieces at teahouses, along the trail by local traders, as well as at the two local factories. Definitely try one, as it is very much part of not just Langtang but a proper Nepali experience too!
Permits Required for This Trip
This itinerary requires two main permits, both of which are entries to the two protected areas of Nepal:
- Shivapuri National Park Entry Permit (SNPEP): Required for all trekkers entering the Shivapuri National Park after entering Sundarijal. The current cost is NPR 1,000 for foreign nationals and NPR 600 for SAARC nationals. Your guide will help you get your tickets at the checkpoint of Sundarijal, and later, it’s checked at Chisapani.
- Langtang National Park Entry Permit (LNPEP): Required for all trekkers entering the Langtang National Park. The current cost is NPR 3,000 for foreign nationals and NPR 1,500 for SAARC nationals. This is checked at the army checkpoint in Kutumsang, possibly Magingoth, and at the Ghoda Tabela checkpoint on the trail.
The TIMS (Trekkers' Information Management System) card, previously required for the Langtang route, is not widely used right now and is also not being actively enforced at most Langtang trail checkpoints as of 2026.
So, we won’t be including it for the time being, but in case the legal requirements change, we will handle TIMS as well as every other permit required for this Langtang trek accordingly!
Talking about Kathmandu Sightseeing Entrance Fees, Day 2 of UNESCO heritage tour covers 4 sites, and their entrance fees are also included in the package cost. For transparency, here are the current rates for foreign nationals:
Note that museum entry fees within Durbar Square complexes and any additional monument entry fees are separate from the main site ticket and are not included in this package. But our guide will help you out, and you may pay them directly on-site!
So, budget approximately NPR 2,500 to 3,000 total for entrance fees on Day 2, plus any museum additions you choose to make.
Cost of This 13-Day Trek Package Explained
The total cost of this 13-day Langtang Trek package covers all the core components required for the trekking days. Understanding where that cost goes helps you see the value clearly.
You’re paying for:
- Salaries of the two government-licensed guides (one tour guide for Kathmandu sightseeing and another trek guide for Gosaikunda-Langtang).
- Trek guide's accommodation and meals for the duration of the trip.
- Sightseeing entrance fees in Kathmandu’s heritage sites.
- Your accommodation along the trail at pre-arranged teahouses.
- Accommodation with breakfast in Kathmandu’s 3-star hotel (lunch and dinner excluded).
- A cultural farewell dinner in Kathmandu upon trek completion.
- Your meals from the first lunch on the trek (in Day 3) through the final lunch (in Day 12).
- Your Langtang National Park and Shivapuri National Park Entrance permits.
- Both land transportation from your hotel to Sundarijal and from Sano Bharkhu back to your hotel in a private vehicle.
- Any standard emergency arrangements your guide may need to coordinate along the route.
What is typically not included is your personal spending along the trail (such as extra snacks, hot showers, additional beverages, or souvenirs), your international flights, your Nepal visa, travel insurance, and any personal tipping for the guide and driver at the end of the trip.
Why this cost from Altitude Himalaya is worth it:
- You are trekking with a full operation team that has first-hand experience on this specific trail. This is not a booking platform that subcontracts the actual guiding.
- All logistics, permits, and teahouse bookings are handled in advance, so you arrive and walk without the administrative friction.
- Our guides carry basic first aid and are trained in altitude sickness recognition, giving you a real safety layer on a route that reaches 4,985 m.
- Pre-arranged accommodations even in peak season so you don’t have to search for a room after a 6-to-8-hour hiking day.
- You get direct support from our Kathmandu team throughout the trip for any changes, weather delays, or adjustments needed.
Preparation Tips For You
For this 13-day moderately difficult trek that reaches a maximum elevation of 4,985 m, your trek preparation does not need to be intense, but it does need to be good. A few specific areas are worth focusing on before you arrive, and we shall help you out in this section.
When to Book Your Flight?
Book your flight as soon as your trek dates are confirmed, but give yourself enough time to make the decision clearly.
For the peak seasons of Spring and Autumn, flight prices to Kathmandu tend to rise considerably as the season approaches, and popular departure dates fill up faster than most people expect.
A good rule of thumb is to book at least:
- 6 to 8 weeks in advance for peak season travel
- 3 to 4 weeks in advance for off-peak months.
Do not book so far in advance that a sudden schedule change becomes costly, but do not leave it so late that you end up paying significantly more or flying on an inconvenient itinerary.
The popular carriers flying into Tribhuvan International Airport (TIA) in Kathmandu are Qatar Airways, Turkish Airlines, Emirates, Singapore Airlines and Air India. But be sure to compare prices between a few options before you pull the trigger!
Getting Travel Insurance
Travel insurance is not compulsory for this 13-day trek in the Langtang region, but it is strongly recommended.
The Langtang trail reaches 4,985 m at Tsergo Ri, and at that altitude, the nearest proper medical facility is hours away. Also, you’ll be sleeping at an altitude of 4,380 meters at Gosaikunda after crossing a high-altitude pass of 4,610 m.
That means helicopter rescue becomes the only emergency evacuation option from the upper sections of the trail.
When choosing a travel insurance policy, make sure it specifically covers:
- High-altitude trekking above 5,000 m (even if your planned maximum is slightly lower).
- Emergency helicopter evacuation
- Medical treatment and hospitalization (because of altitude sickness)
- Trip cancellation or interruption
- Lost or delayed baggage.
Budgeting Beyond the Package Cost
Your package cost covers the core expenses of the trek, but there is a set of personal expenses you need to budget for separately. And being underprepared for cash in the mountains can become a genuine inconvenience!
Here are some essential tips:
- Keep around USD 100 to 120 in NPR cash, as you might need it to spend on extra beverages, hot showers, snacks between meals, WiFi cards at Lama Hotel, or any small items you might like to pick up along the way. Prices increase as you gain altitude in Langtang, so keep that in mind.
- There are ATMs in Sundarijal and only one in Kyanjin Gompa, but note that the latter is not reliable enough to depend on. Card payments are not accepted at teahouses anywhere on the route. Exchange your currency in Kathmandu before you leave, either at the airport on arrival or at a money exchange counter.
- On tipping: a combined tip of at least 10% of your total package cost, distributed among your guide, porter, and driver, is the standard across all trekking destinations in Nepal!
Following Responsible Tourism Policy
Langtang National Park is one of the 13 national parks of Nepal, and the communities inside it are small, ecologically sensitive, and culturally distinct. How you move through this region matters, and we ask all our trekkers to follow our responsible tourism policy. A few things to keep in mind specifically for this route:
- Carry out all waste that you bring in. Most teahouses have dustbins, but in the upper sections, waste management is limited.
- Avoid using single-use plastics.
- Buy from local producers where you can. The yak cheese at Kyanjin Gompa and Chandanbari (Sing Gompa), hand-knitted gloves and woolen items sold in teahouses, and locally prepared snacks all support the families who live and work along the trail.
- The upper sections of the Langtang Valley are considered non-violent zones in the region's Tibetan Buddhist tradition. Even if meat is occasionally available, choosing vegetarian options shows respect for the beliefs of the communities you are passing through.
- At Gosaikunda, the lake and its basin are considered a living sacred site. So, stay on marked paths, do not disturb the lake surface with loud activity, and treat the religious structures (Shiva temple, lingam and tridents at the water's edge, etc.) with the same care you would give any active place of worship.
- Before photographing pilgrims or religious ceremonies, ask first!
Altitude Sickness: Risks and Prevention
This 13-Day Langtang Valley Gosaikunda Trek stays close to the 5,000 m mark, which means the altitude risk is moderate. But altitude sickness does not have a fixed threshold, and some people feel its effects as low as 3,000 m.
So, dismissing the risk because the altitude in Langtang seems manageable is the most common mistake trekkers make!
The early symptoms of Acute Mountain Sickness (AMS) are: persistent headache, nausea, dizziness, difficulty sleeping, and unusual fatigue. If you notice any of these,
- Slow down immediately. Do not push through hoping it will pass.
- Inform your guide, rest, drink water, and observe whether the symptoms improve or worsen over the next hour.
But as we know, prevention is better than cure. And here are the best tips for that:
- Pace yourself properly. Do not rush the ascent, especially on Day 6.
- Drink at least 3 to 4 litres of water per day.
- Avoid alcohol entirely during the trek.
- Garlic soup and sea buckthorn juice (that we mentioned earlier) are both available on the trail, and they genuinely support acclimatization.
- While acetazolamide (Diamox) is a great precautionary medication, please consult your physician before use. Don’t consume it like a normal medicine.
Good news: When trekking with our team, we have a guide who is trained to recognize AMS symptoms and will monitor your condition throughout the trek.
If symptoms escalate, his/her immediate response will be to help you descend to a lower elevation immediately!
Keep Buffer Days in Your Schedule
This 13-day itinerary does not build in a spare day anywhere along the trekking route, so adding one extra day beyond the standard package is not just "worth considering," it is genuinely essential on this route.
The push from Ghopte to Gosaikunda (Day 6) is the day this matters most. You are covering 1,180 m of elevation gain in one stretch, crossing the 4,610 m Laurebina Pass, and reaching Gosaikunda itself at 4,380 m, all before dinner.
For an experienced trekker, this is doable in one long day. For a beginner, or for anyone showing early AMS symptoms, trying to force this whole stretch in a single push is where most problems on this trek actually happen.
This is exactly why we ask every group to keep at least one buffer day beyond the standard 13-day itinerary. If the pace on Day 6 turns out to be too much, Phedi High Camp (4,220 m) is where you want to stop and spend the night instead of pushing on to Gosaikunda.
It sits just below the pass, gives your body one more night to acclimatize before the highest point of the trek, and turns one exhausting day into two manageable ones.
And if AMS symptoms do show up and someone on your team cannot continue, Phedi is also where we will base you for the return, as noted earlier in the itinerary. Without a buffer day built into your schedule, you simply won’t have that flexibility to make that call.
Weather is the other reason to keep a spare day in hand. The Langtang region has become less predictable in recent years, partly because of "season creep" and the broader effects of climate change.
Heavy snowfall near Gosaikunda, Laurebina Pass, or on your Kyanjin Ri or Tsergo Ri day can delay you on its own, and you will want that buffer in your back pocket rather than scrambling to rearrange flights.
Beyond safety, slowing down is also where the best parts of this trek happen. A second afternoon in Kyanjin Gompa to properly explore the village and the cheese production centre, or a real conversation with a Tamang family in Thulo Syaphru or one of the Langtang villages, are the things a tight schedule does not allow for!
Packing Essentials: Clothing and Equipment List
The packing approach for this 13-day trek is pretty much straightforward: just carry what you need for the conditions you will actually face!
The trail goes from subtropical lower sections at around 1,500 m to an alpine valley at nearly 4,985 m (with one night even at 4,380 m), so layering is essential. Let us help you out with the complete packing list for the Langtang trek:
For your jeep or vehicle drive:
- Comfortable clothing for a 5 to 6-hour bumpy road journey (mainly during the Kathmandu return from Sano Bharkhu)
- Light jacket (the mountain road gets cool even in warmer months)
- Motion sickness tablets if you are sensitive to winding roads
- Light snacks for the drive (optional)
For trekking in lower regions (Sundarijal to Kutumsang and Thulo Syaphru to Lama Hotel):
- Moisture-wicking trekking shirts (3 to 4)
- Lightweight trekking pants
- Hiking shorts (optional, for warmer days)
- Comfortable trekking boots that are already broken in
- Trekking socks (6 to 7 pairs, wool recommended)
- Sun hat and sunglasses
For trekking in higher regions (Kutumsang to Cholangpati, Lama Hotel to Kyanjin Gompa, and Hike to Kyanjin/Tsergo Ri):
- Fleece or merino mid-layer jacket
- Insulated down jacket (essential above 3,500 m)
- Hardshell or windbreaker outer layer
- Warm trekking pants or thermal leggings
- Gloves (light for daytime, insulated for morning and evening)
- Beanie or warm hat
- Gaiters (optional, useful in snow or wet trail conditions, can be rented)
For overnight stays:
- Thermals or base layer for sleeping
- Camp sandals or flip-flops for inside the teahouse
- Sleeping Bag (optional for Gosaikunda stay, particularly during peak season when there are more pilgrims)
Must-have trekking essentials:
- Trekking poles (a pair; essential for the Kyanjin Ri and Tsergo Ri ascent along with the descent from Gosaikunda to Dhunche)
- Daypack (20 to 30 L for the days when the main bag stays at the lodge)
- Headlamp with extra batteries
- Rain poncho or packable rain jacket
For Sightseeing in Kathmandu:
- Comfortable walking shoes or light trekking shoes
- Light daypack (for water, sunscreen, camera, and documents)
- Clothing that covers your shoulders and knees (required entry at Pashupatinath and recommended at all religious sites)
- Scarf or shawl (useful for temple etiquette, available to purchase in Kathmandu if needed)
- Sunscreen and a sun hat (the sightseeing day involves significant time outdoors)
- NPR cash for entrance fees (approximately NPR 2,600 to 3,000 for all 4 sites)
- Your passport or a copy, as some sites check identification at entry
Personal care and toiletries:
- Sunscreen (SPF 50 minimum; alpine UV is intense)
- Lip balm with SPF
- Hand sanitizer and wet wipes
- Dry shampoo (optional)
- Small personal towel
- Tissues (dry and wet)
- Blister plasters and basic first aid kit (with essential medicines)
- Altitude medication (consult your doctor before the trip; Diamox/acetazolamide is commonly used)
- Knee compression sleeves, if you have any existing joint sensitivity
Gadgets and electronics:
- Camera with extra memory cards and lens cloth
- Universal travel adapter (Nepal uses 230V, 50 Hz)
- Power bank (essential for the higher stops where charging may be limited)
- Earphones or earbuds and a downloaded playlist or podcast for the drives
Optional and recommended extras:
- Water purification tablets (reduces reliance on bottled water at higher stops, where prices rise significantly)
- Electrolyte sachets (optional, drink at least one per day from Thangshyap upward)
- Trail snacks from Kathmandu, such as protein bars, nuts, dark chocolate, and granola bars (significantly cheaper to buy in Kathmandu than on the trail)
Customizations Available For Langtang Trek
There are multiple ways to customize the Gosaikunda-Langtang itinerary. Let’s get into them one by one.
Starting Sano Bharkhu or Dhunche
If you would rather trek Langtang Valley first and finish at Gosaikunda, keep in mind that the regular 12-day version of this reversed route, which starts by driving straight to Syaphru Bensi, is currently closed off because of the flood damage on that road.
So, even if this is the direction you want to go, you will need to start from either Dhunche or Sano Bharkhu instead, and only once that stretch of road becomes accessible again. The itinerary for this version looks like this:
- DAY 01: Kathmandu Arrival, Trek Briefing.
- DAY 02: Kathmandu Sightseeing, Trek Preparation.
- DAY 03: Drive to Sano Bharkhu, Trek to Thulo Syaphru.
- DAY 04: Thulo Syaphru to Ghoda Tabela.
- DAY 05: Ghoda Tabela to Kyanjin Gompa.
- DAY 06: Tsergo Ri or Kyanjin Ri Hike.
- DAY 07: Kyanjin Gompa to Lama Hotel.
- DAY 08: Lama Hotel to Gosaikunda.
- DAY 09: Gosaikunda to Thadepati via Laurebina/Suryakunda Pass.
- DAY 10: Thadepati to Kutumsang.
- DAY 11: Kutumsang to Chisapani.
- DAY 12: Chisapani to Sundarijal, Drive Back to Hotel.
- DAY 13: Farewell, Departure.
Starting From Dupcheshwor
As mentioned earlier, starting from Dupcheshwor is also possible. The road here goes up to Talu Village, which cuts the trek down by one day compared to the standard Sundarijal start.
The itinerary for this version looks something like this:
- DAY 01: Kathmandu Arrival, Trek Briefing.
- DAY 02: Kathmandu Sightseeing, Trek Preparation.
- DAY 03: Drive to Talu Village.
- DAY 04: Talu to Ghopte.
- DAY 05: Ghopte to Gosaikunda.
- DAY 06: Gosaikunda to Thulo Syaphru.
- DAY 07: Thulo Syaphru to Ghoda Tabela.
- DAY 08: Ghoda Tabela to Kyanjin Gompa.
- DAY 09: Kyanjin Ri or Tsergo Ri Hike.
- DAY 10: Kyanjin Gompa to Lama Hotel.
- DAY 11: Lama Hotel to Sano Bharkhu, Drive to Kathmandu.
- DAY 12: Farewell, Departure.
Note: You can even start from Sano Bharkhu and end the trek at Sundarijal.
Adding an Extra Night at Phedi or High Camp
If you would rather add a day for comfort and safety instead of cutting one, staying an extra night at Phedi High Camp before the Gosaikunda push is a smart way to do it, especially if you read the difficulty section above.
Splitting the long Ghopte to Gosaikunda day into two gives you a real acclimatization buffer right before the highest point of the trek. The itinerary for this version looks like this:
- DAY 01: Kathmandu Arrival, Trek Briefing.
- DAY 02: Kathmandu Sightseeing, Trek Preparation.
- DAY 03: Drive to Sundarijal, Hike to Chisapani.
- DAY 04: Chisapani to Kutumsang.
- DAY 05: Kutumsang to Thadepati.
- DAY 06: Thadepati to Phedi or High Camp.
- DAY 07: Phedi to Gosaikunda via Suryakunda.
- DAY 08: Gosaikunda to Thulo Syaphru.
- DAY 09: Thulo Syaphru to Ghoda Tabela.
- DAY 10: Ghoda Tabela to Kyanjin Gompa.
- DAY 11: Kyanjin Ri or Tsergo Ri Hike.
- DAY 12: Kyanjin Gompa to Lama Hotel.
- DAY 13: Lama Hotel to Sano Bharkhu, Drive Back to Kathmandu.
- DAY 14: Farewell, Departure.
Note: Once the Tamang Heritage Trail reopens, it becomes possible to combine all sections of Langtang, Tamang Heritage, Helambu, and Gosaikunda into one single, even longer journey. If that kind of extended trip interests you, please contact us directly, and we will build it around your dates. Or check our already-existing 19-day Extended Langtang Trek Package.
Additional Options
If you want something short, definitely go through these other packages available from our Langtang Valley team:
Beyond these packages, we can also customize the itinerary based on your requirements within the Langtang region. These may include separate or combined trips focused on Helambu, Panch Pokhari-Thangkpal, or even Jugal Himal areas.
And for citizens of the USA, the UK, and Australia, we have our separate teams in these countries. Be sure to contact our team at Tours From USA, Tours From UK, or Tours From Australia to learn more.
Thanks for sticking with this package until the end! We hope to serve you in Nepal very soon. And to learn more about Langtang Valley, be sure to go through our regularly updated blogs here.




 1317 M
 Hotel