Langtang is one of Nepal’s premier high-altitude trekking destinations where you get to trek next to towering peaks ranging up to 7,234 meters.
The altitude distinguishes Langtang and other treks in Nepal from the rest of the world. But it does make things more challenging as well. Altitude sickness is a major concern, and if you do fall ill, emergency rescue may not be easy because there are hardly any roads or hospitals in the mountains.
In short, I’d say that not being prepared for altitude sickness and ignoring symptoms is the no. 1 mistake trekkers make in Nepal.
It’s the leading cause of trekking deaths here because treks in Nepal are not like most of the world. Everything here is high altitude, and that needs to be respected and prepared for. And that’s exactly what this guide is meant to help you with.
Disclaimer: The information in this article is for educational purposes only. Consult your doctor regarding any medicines and use meds in the field under expert guidance only.
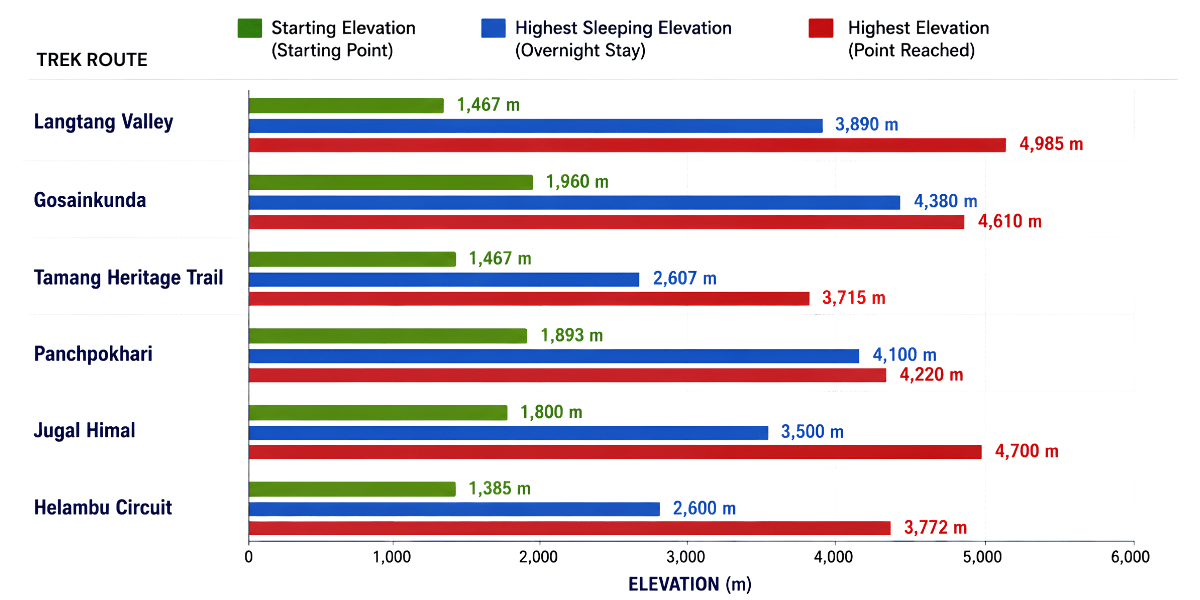
Langtang Trek Altitude Profile [Based on Trekking Routes]
|
Trek Route
|
Highest Elevation
|
Highest Sleeping Elevation
|
Starting Elevation
|
Avg. Daily Elevation Gain
|
AMS Risk Level
|
|
Langtang Valley
|
4,400 m (Lower Kyanjin Ri) or 4,985 m (Tserko Ri)
|
3,890 m (Kyanjin Gompa)
|
1,467 m (Syabrubesi)
|
900 - 1200m
|
Low on the trek, medium at viewpoints
|
|
Gosainkunda
|
4,610 m (Suryakunda)
|
4,380 m (Gosainkunda lake)
|
1,960 m (Dhunche) or 1,467 m (Syabrubesi)
|
600 - 1200m
|
Low (with slow itinerary) or high (with fast itinerary)
|
|
Tamang Heritage
|
3,165 m (Nagthali) or 3,715 m (Taruche)
|
2,607 m (Tatopani)
|
1,467 m (Syabrubesi)
|
400 - 500m
|
Very low
|
|
Panchpokhari
|
4,220 m (View Point Ridge)
|
4,100 m (Panchpokhari)
|
1,893 m (Chhimti)
|
700 - 900m
|
Low to medium
|
|
Jugal Himal
|
4,700 m (Jugal View Point)
|
3,500 m (Ne Pemachal)
|
Tembathang
|
800 - 900m
|
Low to medium
|
|
Helambu Circuit
|
3,772 m (Ama Yangri)
|
2,600 m (Tarkeghyang)
|
1,385 m (Sundarijal)
|
600 - 700m
|
Very low
|
Please note that these altitude profiles are based on our standard itineraries. It’s always possible to modify the itinerary so that you gain elevation at an even slower rate.
The opposite is also true; you can go faster than our itineraries. But that increases the risk of altitude sickness a lot, so we do NOT recommend that.
Additionally, Langtang has a bunch of popular peaks above 5000 and 6000 meters. At these altitudes, the air is 45%-53%, or even thinner compared to sea level.
Slow altitude gain and rotations help. But there is simply so little oxygen that altitude sickness is always a possibility during peak climbing and expeditions.
So, if you’re going for Yala Peak, Naya Kanga, or any other peak in the region, do keep this in mind!
Major High-Altitude Destinations in Langtang
In the altitude profile above, you saw viewpoints that climb to 5000 meters or higher and villages where you’ll sleep as high as 4,380 meters.
Now, you may be curious. Are the ones listed there the highest elevation locations in Langtang? In fact, what other interesting locations will you find as you climb high in the region?
Let’s go over that next, sorted by highest to lowest elevation.
Langtang Lirung (7,234 m)
At 7,234 meters (23,733 ft), Langtang Lirung is the highest peak in the Langtang region. It’s perched right above Langtang village and Kyanjin Gompa and stands out immediately due to its extreme prominence.
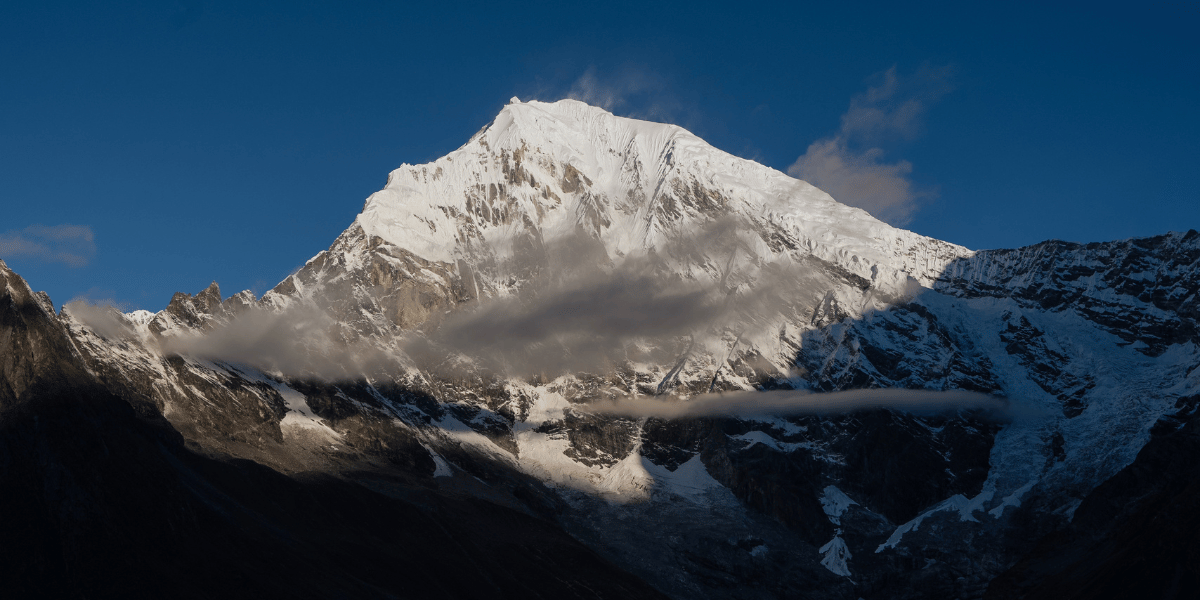
The base camp is as far as most people can reach via trekking. Even for expedition teams, it's very rare to try to climb this mountain due to its challenging nature.
But even if you can’t get to the top, Langtang Lirung is still worth mentioning as the most iconic peak in the region.
Naya Kanga (5,863 m)
Naya Kanga is the most popular climbing peak in the region. This is an accessible peak just 2 days away from Kyanjin Gompa. For ambitious trekkers looking to get into mountaineering, this is an excellent entry-level peak. You just need the right permits, team, equipment, and some basic skills.
The initial climb up to high camp (4,987 m) already gives some of the best views on the Langtang trek. From the summit, you’ll have 360° views of west-Nepal peaks, Tibet towards the north, east-Nepal peaks, and views of Kathmandu and the mid-hills to the south.
Yala Peak South (5,520 m)
This is the highest trekking peak in the region. Although basic climbing skills/equipment can be necessary depending on the season and conditions, it’s still classified as a trekking peak. So, no permits required!
The climb to the lower summit (Yala South) involves a simple 5-8 hour hike from Kyanjin to the base camp, overnight camp, summit the next morning, and return back.
This peak is doable for most people for most of the year. It’s an excellent side trip to reach the highest permit-free viewpoint of the region.
The higher summit (5,732 m) is rarely attempted, as it involves a glacier traverse and a tougher climb.
Tilman Pass (5,350 m)
This is a remote and technical mountain pass that connects two of the most beautiful treks in Langtang. It takes you from the Langtang Valley to Panchpokhari and is an adventurous route ideal for experienced trekkers looking for a challenge.
The pass crossing requires 3-4 days of camping with local guides/porters for support. It is extremely dangerous to attempt this solo or during bad weather.
Ganja La (5,180 m)
Ganja La is a mountain pass that connects Kyanjin Gompa to the Ama Yangri (Helambu Circuit) area.
Like Tilman pass, this is a technical route that requires 3-4 days of remote camping and a support team. Needless to say, it’s not for beginners or solo hikers.
Tserko Ri (4,985 m)
Tserko Ri is the highest point on most Langtang Valley trek itineraries. It’s a 4-6 hour uphill hike from Kyanjin Gompa, done early in the morning for the sunrise and clear mountain views.
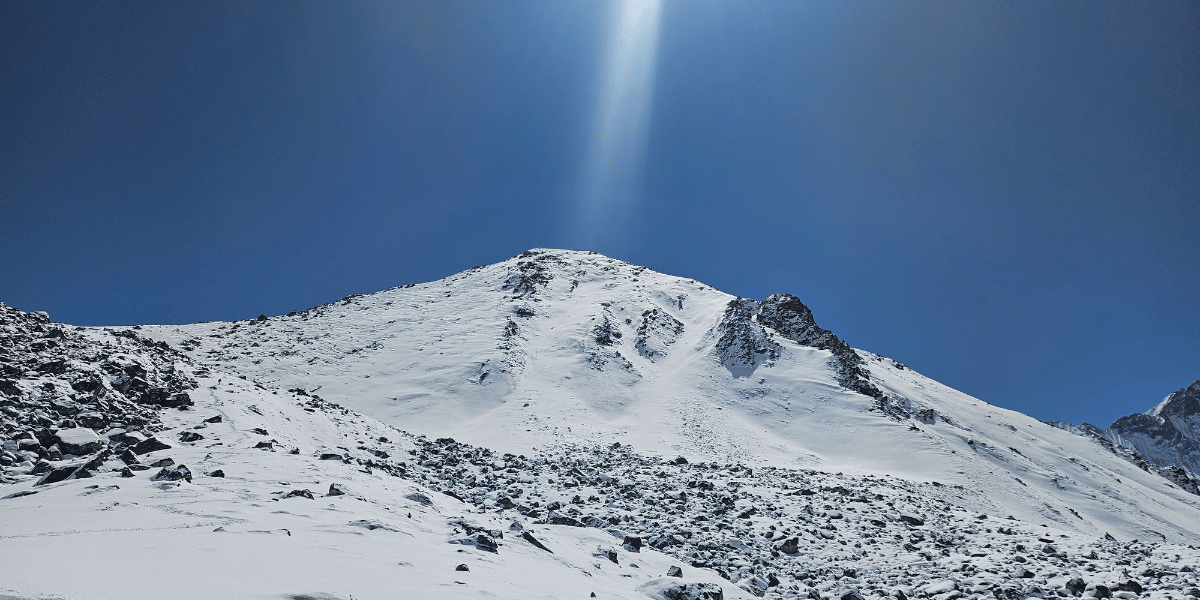
You’ll witness Langtang Lirung (7,234 m), Naya Kanga (5,863 m), Langshisha Ri (6,412 m), Ganchenpo (6,378 m), Dorje Lhakpa (6,966 m), and various other peaks around you and some beautiful valleys and villages below you.
It’s normally a straightforward uphill trek, but the route may be inaccessible during the off-season or extreme weather.
Upper Kyanjin Ri (4,700 m)
This is an alternative viewpoint on the Langtang Valley trek, typically done if you only have half the day to visit a viewpoint or if Tserko Ri is inaccessible.
This ridge starts from Lower Kyanjin Ri (4,400 m), which sits right next to the Lirung Glacial Lake. It slowly rises till 4,700 m along a similar direction as the Langtang glacier. From the top, you’ll have some of the closest views of Langtang Lirung.
When trekking here, you can also stop early at the lower viewpoint if you’re not sure about your fitness/condition.
Lower Kyanjin Ri (4,400 m)
Lower Kyanjin Ri is the most popular viewpoint on the Langtang Valley trek. This is due to the fact that it remains accessible to most trekkers for most of the year.
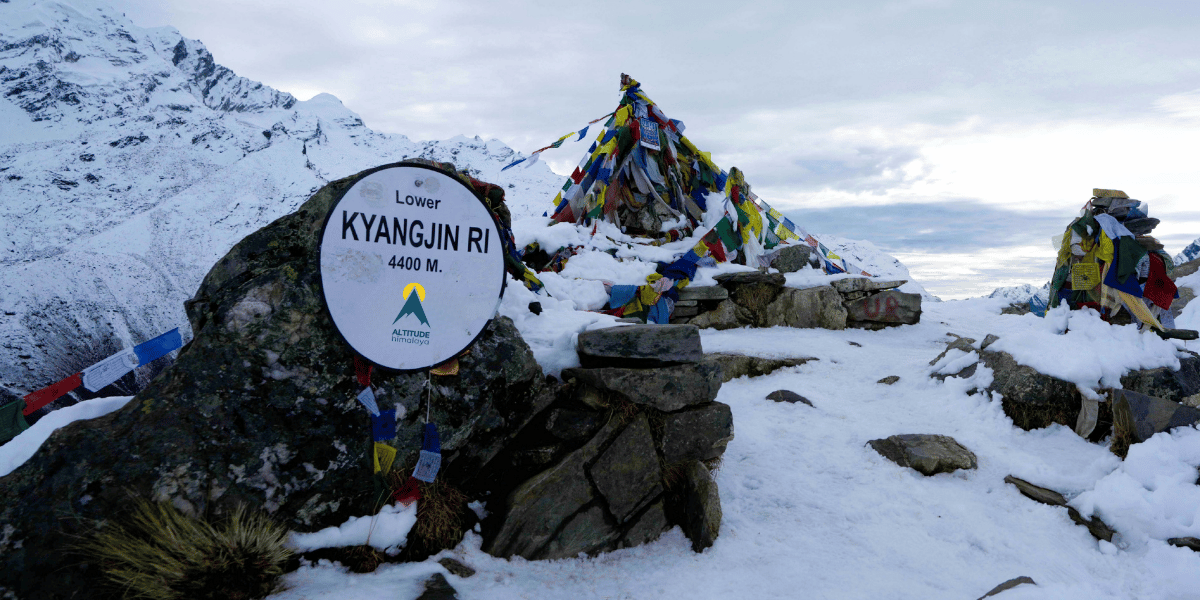
It’s only a 1-2 hour hike from Kyanjin Gompa and can be done as a sunrise hike, a sunset hike, or at any other part of the day.
Don’t let the lower altitude and easier grade fool you, though; your experience won’t be any worse because it’s easier. The views are almost as good as higher spots like Tserko Ri, with the same panorama and valleys surrounding you.
Jugal View Point (4,700 m)
Jugal View Point is the highest point on the Jugal Himal trek. It’s a 4-5 hour uphill hike from the lodges at Ne Pemachal.
First comes the climb to the lower vantage point at Bumba Sherpu (4,200 m). The remaining route to Jugal Base Camp (4,700 m) is a bit more remote. So, the trail can occasionally be hard to find (e.g., during foggy weather or deep winter snow).
But if the weather’s fine, you’ll have the best views of the Jugal range, including Jugal I (6,591 m), Dorje Lhakpa (6,966 m), Gyalzen Peak (6,151 m), and more.
A higher vantage point called Everest View Point (5,570 m) is also in the works. Once properly established and managed, trekkers will be able to gaze upon five 8000-meter peaks from here (Mt. Everest, Lhotse, Makalu, Cho Oyu, and Shishapangma).
Lauribina Pass (4,610 m)
Lauribina, which translates to ‘without stick’ is the highest point for most Gosainkunda trekkers. This pass connects the Gosainkunda lakes to the Helambu region.
There’s a lot of folklore surrounding the name. Some say ‘lauri bisaune’ signifies that you’ve completed the steep climb, and now you can lay down your trekking stick and pack to rest.
Others believe there’s a lot more spiritual depth to it. They say crossing this steep terrain without a stick is akin to renouncing worldly attachments and facing challenges without support, and this is the way to attain liberation.
If you’re ever in the region, ask the locals about this, and I’m sure you’ll hear some interesting stories and viewpoints!
Anyway, once you’ve reached Lauribina, the rest of the route is downhill. This is true regardless of whether you do North to South (Dhunche-Gosainkunda-Helambu) or vice-versa (Helambu-Gosainkunda-Dhunche).
The Suryakunda Lake (also at 4,610 m) is right next to the pass within Dupcheshwor Rural Municipality, Nuwakot District. Besides that, you’ll see sweeping views of Nuwakot and the lowlands as you cross the pass.
Gosain Kunda Lake (4,380 m)
Gosain Kunda (Gosaikunda) is one of, if not THE holiest lakes in Nepal. It is part of a lake cluster consisting of 108+ alpine lakes spread across the Langtang region.
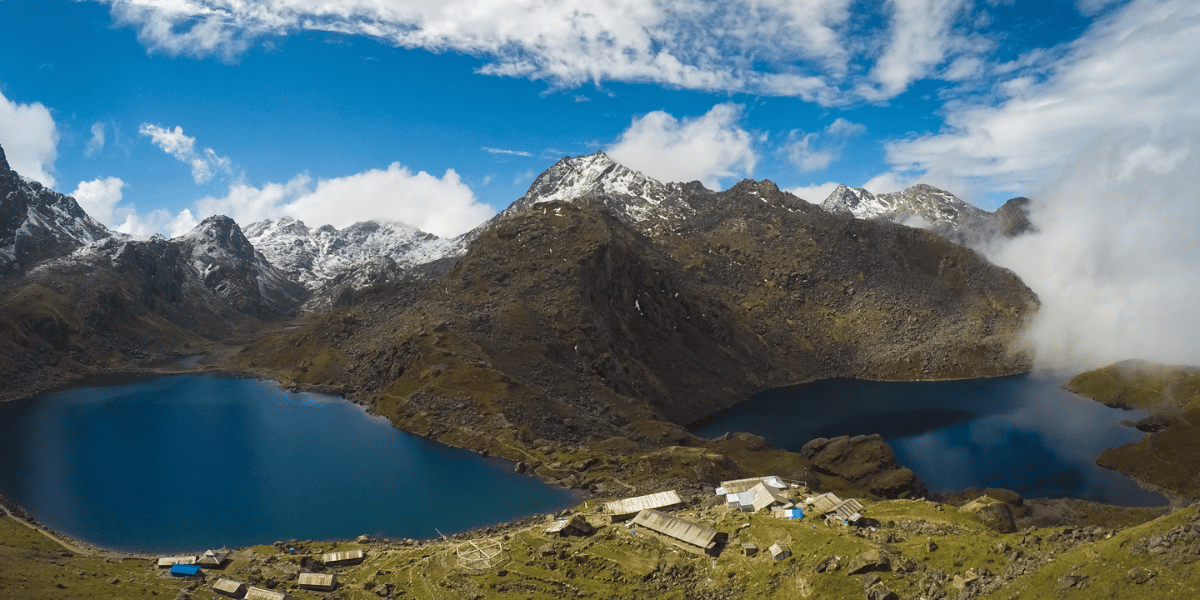
During festivals like Janai Purnima (typically in August), Gosainkunda attracts thousands of pilgrims who take part in the fair and dip in the holy lake to wash away their sins and karma.
Although the lake is considered an abode of Lord Shiva, devotees aren’t the only ones who trek there. Thousands of normal hikers also visit to enjoy the rich forests and wildlife, excellent mountain panoramas, and alpine lakes.
Panch Pokhari Lakes (4,100 m)
Panch Pokhari is another set of 5 holy lakes that you’ll reach at the climax of the Panchpokhari trek.
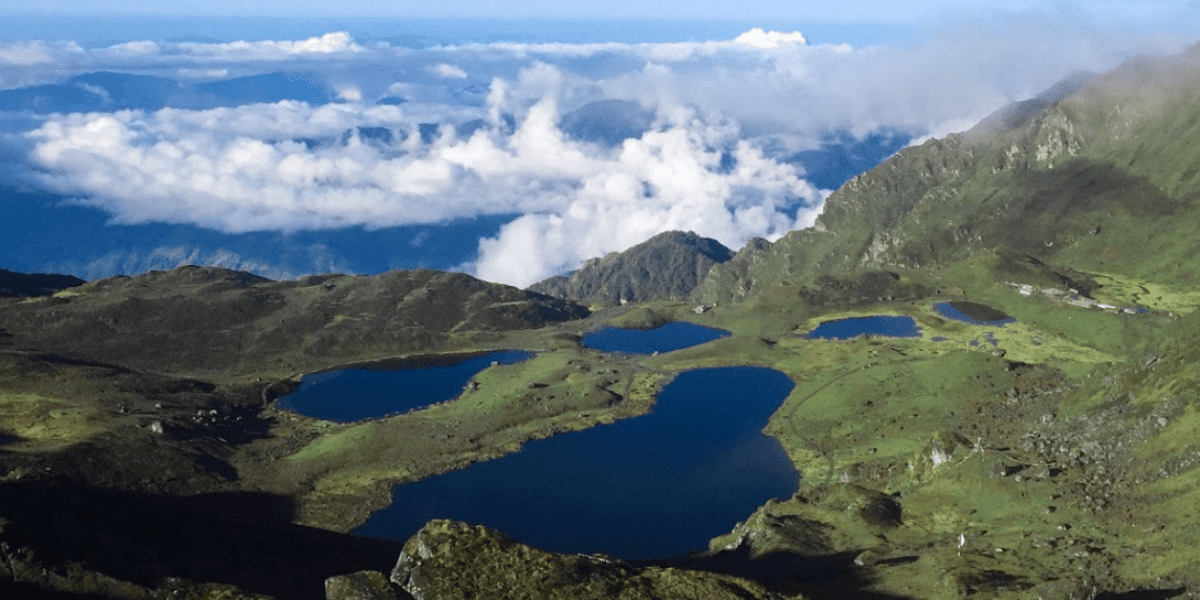
It has its own set of local myths and beliefs (mainly relating to Lord Shiva and early settlers) and attracts thousands of pilgrims during festivals.
Besides the religious aspect, this destination/trek really shines in how affordable and easily accessible it is from Kathmandu (excellent for travellers on a budget or those short on time).
Langshisha Kharka (4,050 m)
Langshisha Kharka is a remote alpine pasture situated some 10 kms east of Kyanjin Gompa.
It can be visited as a day-trip or an overnight camping destination. You won’t find any hotels here, though, only some basic shelters that herders and travellers use.
The fact that it’s secluded makes it excellent for wildlife spotting or peaceful camping. You can also take part in the Langshisha Mela festival here if you visit at the right time.
As it’s a mostly flat hike from Kyanjin, it’s also a good way to spend the day without gaining altitude.
Lirung Glacial Lake (3,960 m)
This is a glacial lake located right above Kyanjin Gompa. It originates from the melting glaciers of Langtang Lirung and Tsangbu Ri and has been rapidly expanding in the last two decades.
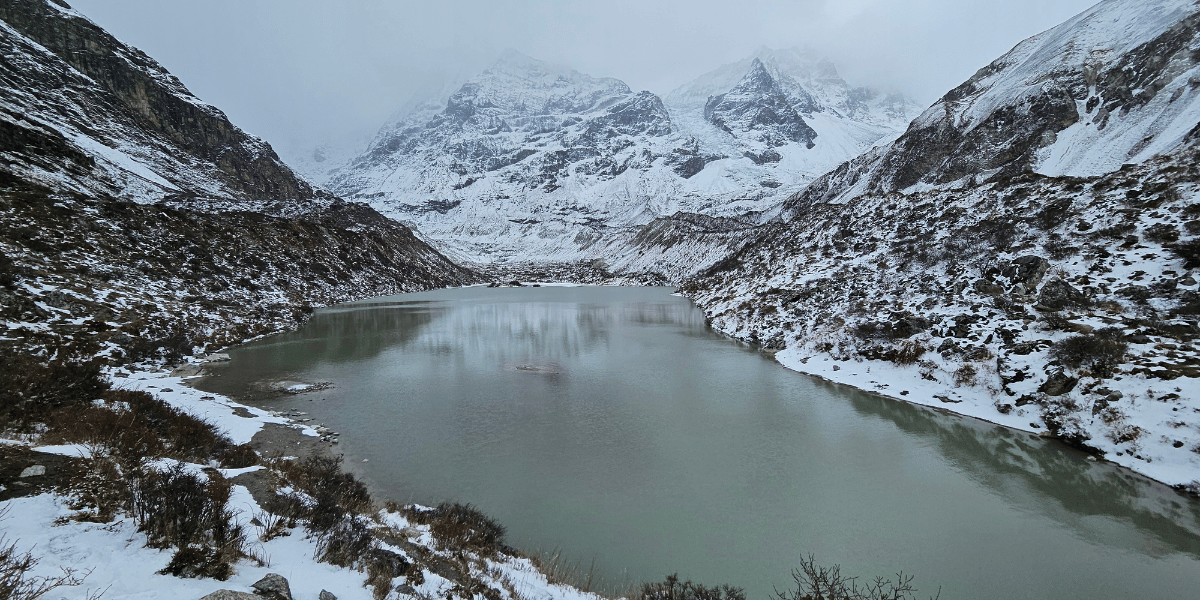
Currently, it also serves as a reservoir for a 100kW micro-hydropower project. This helps keep the lake in check, manage the risk of a glacial flood (GLOF), and provide electricity to the nearby settlements.
For hikers, it’s a 30-60 min trip from Kyanjin; it's excellent if you’re looking for a quick and easy place to explore or if you just want to relax at a lake.
The frozen lake is a sight to behold in winter, but do take precautions if you plan to step onto the ice.
Kyanjin Gompa (3,890 m)
As the most iconic settlement in the Langtang region, you’ve likely seen pictures or postcards of this village.
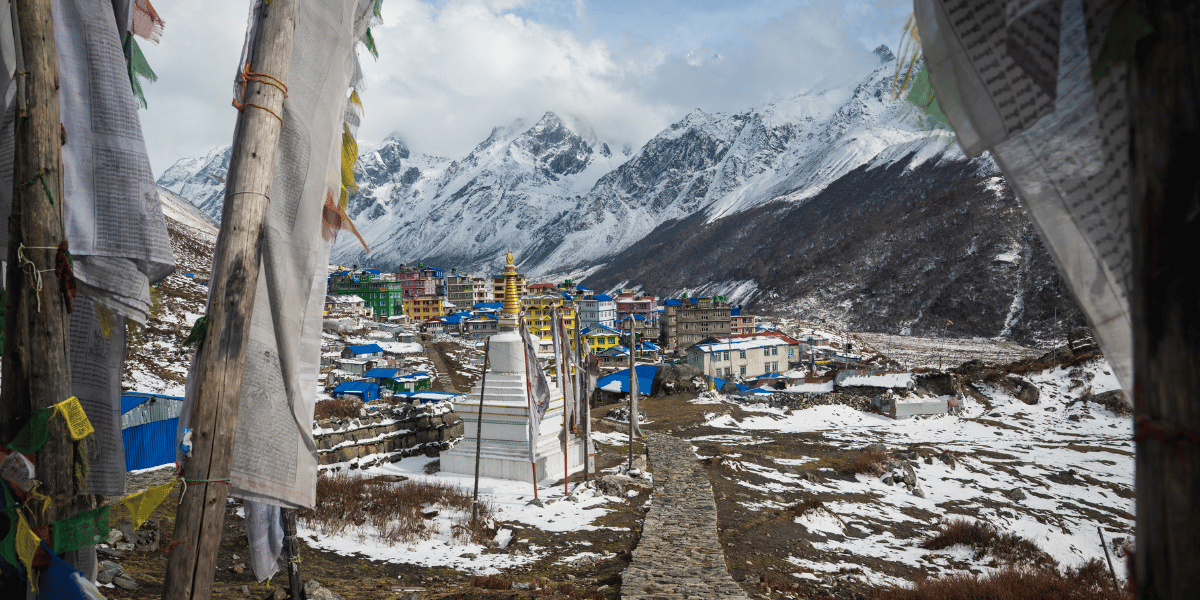
It’s the last village on the Langtang Valley route and gives you access to a ton of interesting locations (lakes, viewpoints, peaks, pastures, the Tibet border, and more).
The village itself has some of the best hotels and amenities throughout the entire trek. The monastery, cheese factory, and various bakeries and cafes are interesting to explore in your downtime.
Ama Yangri Peak (3,772 m)
Ama Yangri is a very popular viewpoint in the Helambu area with a lot of religious significance. The peak is regarded as the guardian mother goddess by the local Hyolmos.
As you trek through the Helambu region to reach the peak, you’ll pass numerous villages still following traditional beliefs and cultural practices.
The peak is also exceptional as a viewpoint, as you’ll see the Langtang and Jugal ranges nearby and the Everest, Annapurna, and Manaslu peaks far to the east and west.
Langtang Village (3,455 m)
As the namesake village, this is one of the most beautiful settlements on the Langtang Valley trek.
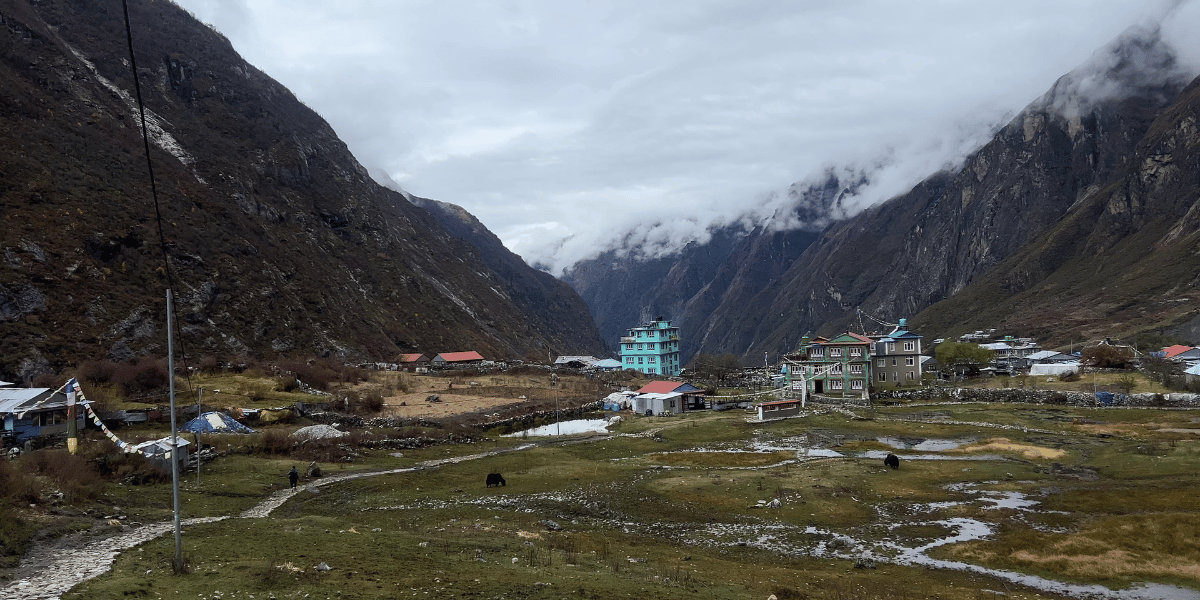
It’s rich in local culture and history with a community that still respects its roots and traditions.
And it’s also rich in terms of mountain views as it’s sandwiched between Langtang Lirung and Baden Powell Peak, with more peaks to the north.
Best Places For Acclimatization
While most of these high altitude locations are accessible and fun to explore, there is absolutely no place for recklessness.
Altitude sickness is typically the biggest risk when visiting these destinations (especially ones above 4,000 meters).
So, a properly designed itinerary that accounts for good acclimatization is non-negotiable.
Speaking of which, here are the best places to acclimatize when trekking in the Langtang region:
- Langtang Village: On the Langtang Valley trek, people generally start feeling the effects of altitude around 3000-3500 meters. This makes Langtang village an ideal location to take an acclimatization day if needed.
- Kyanjin Gompa: Similarly, if you don’t feel ready to climb up to the viewpoints, you can rest for a day or two at Kyanjin Gompa. The village itself is scenic, lively, and interesting, and there are nearby places you can explore without gaining much elevation.
- Kyanjin Ri / Tserko Ri: Trekkers preparing for Yala Peak, Naya Kanga, or other peaks in the region usually visit Kyanjin Ri, Tserko Ri, or both to help acclimatize for the higher peaks.
- Tamang Heritage Trail: The immersive cultural experience is definitely the highlight of the Tamang Heritage route. But this trek is also often done prior to the Langtang Valley trek, as this lower elevation route helps you acclimatize better.
- Nagthali: This is a popular viewpoint on the Tamang Heritage Trail. Trekkers looking to visit higher viewpoints like Taruche (3,700 m) or just trying to acclimatize for the Langtang Valley trek often rest at Nagthali.
- Chandanbari: Chandanbari is a major settlement on the Gosainkunda route. Climbing higher than this village on Day 1 poses a high risk of AMS. This place also has some of the best hotels and amenities you’ll find on this trek. So, it’s a great place to rest on Day 1 or to take an extra day for acclimatization.
- Lauribinayak: For Day 2 or Day 3, Lauribinayak is an excellent acclimatization stop for Gosaikunda trekking. The panoramic views during clear weather are exceptional, especially during the sunset.
- Thadepati: Thadepati is a village you’ll reach on both the Helambu circuit and the Sundarijal-Nuwakot-Gosainkunda route. It’s a high-altitude village from where you can observe peaks to the north, Kathmandu to the south, and the beautiful Sindhupalchowk and Nuwakot districts to the east and west.
- Tuppi Danda/Nosyampati: These are the recommended rest stops for the Panch Pokhari trek. You can go further, especially if you trek long hours. But the altitude gain is rapid, so we do NOT recommend it.
- Panch Pokhari: Trekkers going to the Jugal area via Panchpokhari do so because this offers better acclimatization. Spending the day at the lakes or viewpoint is also a fun idea if you need an extra day.
Altitude Sickness in Langtang Region
If you follow our recommended itineraries, altitude sickness is generally not a concern on the Langtang Valley trek.
At most, you’ll feel some light symptoms like a slight loss of energy or appetite and a light headache.
However, a small percentage of trekkers experience more severe symptoms even with a safe and slow itinerary. This is because altitude sickness susceptibility is highly influenced by genetics and varies from person to person.
Similarly, if you don’t follow a good itinerary and go for a faster ascent, that also makes altitude sickness much more likely.
So, let me explain exactly what altitude sickness is, what causes it, the common mistakes you should avoid, tips to prevent it, and what to do if you’ve already got altitude sickness.
First, What is Altitude Sickness?
Altitude sickness is a type of illness/group of negative symptoms that occur when you rapidly ascend to above 2,500 meters (8,200 feet).
- Genetics plays a key role. Some people start feeling ill as low as 2,000 meters and they tend to have a rough time above 4,000 meters. Others can climb high rapidly and still feel great.
- Rate of ascent is the other key factor. In almost all cases, you can avoid altitude sickness with a well-designed itinerary and planned acclimatization days.
In Langtang Valley, some trekkers feel light symptoms around Ghodatabela (3,008 m) or Langtang village (3,455 m). A lot more will feel the altitude when climbing to viewpoints like Kyanjin Ri (4,700 m) or Tserko Ri (4,985 m).
The same is true for all other treks in the Langtang region. As you climb above 3,500 m → 4,000 m → 5,000 m, more people will feel more symptoms (shortness of breath, harder to climb, general fatigue, headache, etc).
If this is to be expected, which symptoms are normal and at what point should you be concerned? Let’s explore that with the types of altitude sickness.
Types of Altitude Sickness
The air gets thinner the higher you go. Your body tries to adapt to the lower oxygen level, and given enough time, it DOES adapt.
But until it’s fully adapted (aka acclimatized), some systems in your body will fail and cause negative symptoms. The mildest symptoms start as AMS.
Acute Mountain Sickness (AMS)
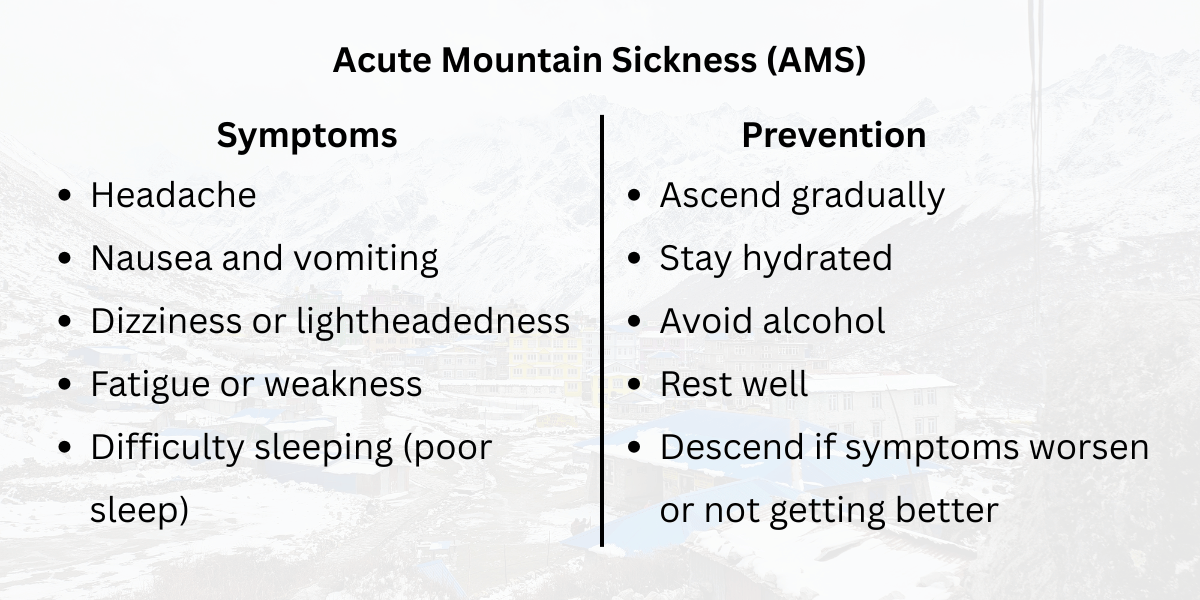
AMS is the first stage of altitude sickness. The symptoms start very light and show up one or two at a time. They include:
- Headache/lightheadedness
- Loss of appetite/nausea
- Disturbed sleep, constantly wake up throughout the night
- Shortness of breath (SOB)
- General fatigue and malaise
For instance, you’ll rest at Lama Hotel or Thangshyap on Day 2 of the Langtang Valley trek. You’ll find that you don’t have much of an appetite despite an entire day of tough physical activity. Your sleep might not be the best either.
As you climb up to Langtang and Kyanjin the next day, you’ll feel some SOB even though the trail is mostly flat.
Self-Diagnosis With Lake Louise AMS Score
Feeling some symptoms and not sure if it’s AMS or something else? Use the Lake Louise questionnaire. It grades the intensity of five symptoms on a scale of 0-3.
Here’s what the 2018 scoring system looks like:
- Headache
- 0 - None
- 1 - Mild headache
- 2 - Moderate headache
- 3 - Severe headache
- Fatigue and/or weakness
- 0 - Not weak or tired
- 1 - Mild fatigue / weakness
- 2 - Moderate fatigue / weakness
- 3 - Severe fatigue / weakness
- Gastrointestinal symptoms
- 0 - Normal appetite
- 1 - Poor appetite or light nausea
- 2 - Moderate nausea / vomiting
- 3 - Severe nausea / vomiting
- Dizziness/light-headedness
- 0 - No dizziness / light-headedness
- 1 - Mild dizziness / light-headedness
- 2 - Moderate dizziness / light-headedness
- 3 - Severe dizziness / light-headedness
- AMS Clinical Functional Score
Overall, if you had AMS symptoms, how did they affect your activities?
- 0 - No impact
- 1 - Symptoms present, but no change in activity or itinerary
- 2 - Symptoms forced me to stop ascending or made me descend
- 3 - Had to be helped down to lower altitude or evacuated
Add your total score, and if it’s 3 or higher and accompanied by a headache, that confirms AMS.
When Should You Be Worried?
If you self-diagnosed with AMS or just noticed a couple of symptoms, should you be worried? It depends on the intensity. The NIH recommends you interpret the total score like so:
- 0 - 2 Points: No AMS or very light symptoms. Keep track of any symptoms but understand that they’re nothing to freak out about. In fact, they may just be due to physical fatigue and dehydration. Eat and rest well; climb slowly.
- 3 - 5 Points: This indicates mild AMS. At this point, you should stop ascending and rest at the nearest village. Take one day to rest, explore the area, and acclimatize and you’ll be just fine (more on this later).
- 6 - 9 Points: Sometimes, people ignore mild AMS and keep climbing, which turns the symptoms into moderate AMS. Do NOT ascend any higher, because if you keep ignoring your symptoms and acclimatization needs now, things will RAPIDLY turn bad. Descending a few hundred meters is a good idea.
- 10 - 12 Points: This indicates severe AMS. Symptoms are debilitating at this stage and can leave you helpless. So, quickly communicate your condition with your guide or a local (if you’re solo) and ask for help. Immediate descent or evacuation is essential because otherwise, you may soon contract HACE or HAPE. These are extremely dangerous conditions that can be fatal within 24 hours.
High Altitude Cerebral Edema (HACE)
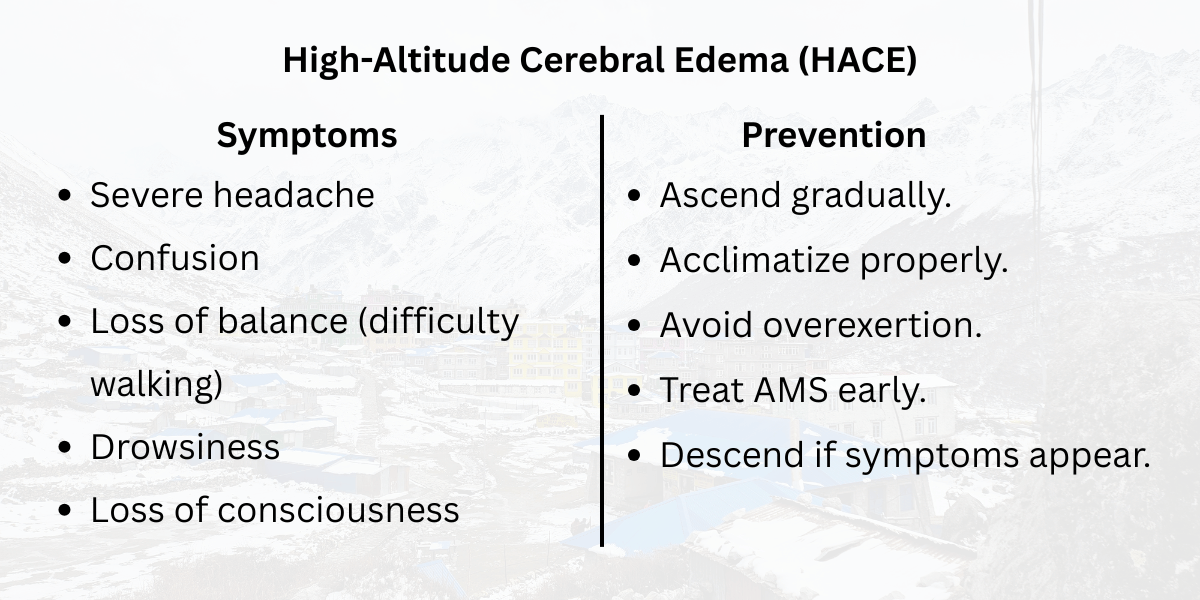
When you have HACE, the brain swells with fluid, leading to a state where you lose normal brain functions (it's as if you’re extremely intoxicated). It can rapidly lead to a coma and death if left untreated.
HACE Symptoms
- Extreme headache
- Ataxia (loss of coordination, can’t walk in a straight line, clumsiness)
- Altered mental state (apathetic, confused, irritable, actions are irrational)
- Slurred speech and trouble speaking
- Drowsiness, which eventually turns into loss of consciousness
- Low SpO₂ reading in pulse oximeter (typically 80-70% or lower)
HACE Treatment
You CANNOT waste time or take things lightly if someone has HACE. Untreated HACE has a fatality rate over 50%; every minute matters.
- Descend immediately. Even a few hundred meters will make a difference. But ideally, try to descend 1000 meters or more. Ask your guide, team, or locals for help descending.
- Ideally, administer supplemental oxygen and keep the SpO₂ above 90%. Some teahouses/mountain lodges or clinics may have oxygen cylinders, while portable oxygen canisters are light enough that every team should carry one.
- Have your guide or another trained person administer Dexamethasone (can be oral, intravenous, or intramuscular). Dex is a fast-acting steroid that controls and reduces swelling. Remember, it is NOT a treatment; it only buys you time. Prioritize the descent.
- Use your satellite device or get your guide, trek operator, or insurance contact to call in a heli rescue. Coordinate the rescue ASAP and be ready in a suitable location for evacuation.
- Some locations like the Mundu clinic or expedition teams may have a hyperbaric chamber (Gamow bag). Have a trained professional operate it and maintain a healthy oxygen level until other rescue methods are available.
Once you’re back in the city, get checked for permanent neurological damage and any other complications.
HACE Prevention
HACE occurs in less than 1% of trekkers. Between 4,000 to 5,500 meters, it mostly happens if you trek recklessly, ignore symptoms, and keep climbing fast.
Above 6,000 meters, there’s always a small chance of HAPE regardless of acclimatization. But you won’t trek to such an extreme altitude. That’s more of a concern for mountaineers, so don’t worry about it.
For trekking, follow a well-designed itinerary, follow our AMS recommendations, and stop ascending if you feel ill; descend if your conditions call for it.
Travel with a trained guide that can recognize the symptoms and handle your first aid and rescue, and you’ll have nothing to worry about regarding HACE.
High Altitude Pulmonary Edema (HAPE)
HAPE is a condition where fluid leaks into your lungs and causes extreme difficulty in breathing. This can rapidly progress to a coma and respiratory or cardiac arrest if left untreated.
HAPE Symptoms
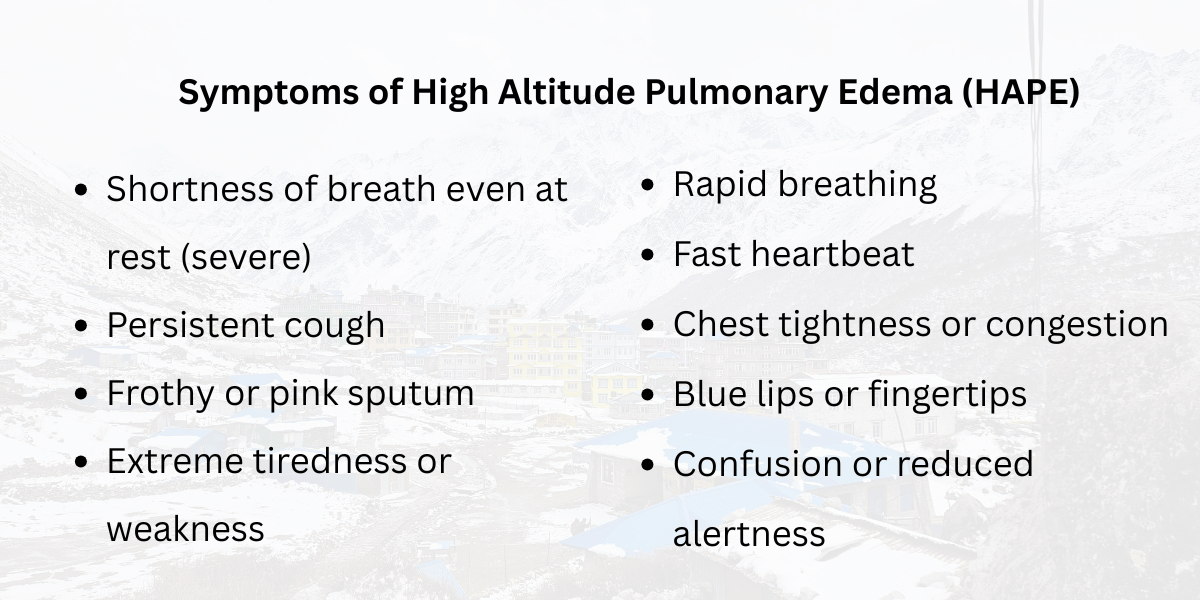
- Severe dyspnea (shortness of breath), breathing becomes more and more difficult even at rest
- Wet lung sounds (a gurgling or rattling sound while breathing can also be felt by touching the patient’s back)
- Difficulty breathing and feeling of drowning when laying down horizontally
- Pink frothy sputum
- Persistent cough
- Cyanosis (bluish discoloration of lips, fingernails, and skin)
- Extremely low SpO₂ reading in pulse oximeter (typically 60-40% or lower)
HAPE Treatment
Like with HACE, you must immediately start first aid and rescue protocols for HAPE. There’s no time to waste. But you do have to keep a couple of differences in mind:
- Descend immediately with minimal exertion. Physical exertion makes the fluid buildup in the lungs worse, so have the patient carried down by a horse or porters. Ideally, you can just get picked up by a heli from your current location without needing to move.
- While resting or descending, use supplemental oxygen and try to maintain the SpO₂ above 90%.
- HAPE causes the blood pressure in your lungs to spike extremely to the point of damaging your capillary walls and causing fluid to leak into the air sacs. Have your guide or another trained person give you Nifedipine. It blocks calcium channels, which forces the lung vessels to relax and widen, reducing blood pressure in the lungs by 30-50%. This stops the tearing of the walls, which stops fluid leakage.
- If Nifedipine is not available, Tadalafil/Sildenafil may be used as alternatives. But so far, we only have limited scientific evidence to support their effectiveness against HAPE.
- Most importantly, do NOT combine these drugs. This can cause dangerous side effects like extreme blood pressure drop and fainting.
- Exercise caution when combining Dex and Nifedipine as well. In rare cases, people contract HACE and HAPE together. So, using the meds together may be the only option to stabilize the victim. But it must be done under professional supervision. The blood pressure needs to be lowered to relieve the lungs, but not so low that blood flow to your already oxygen-starved brain is reduced.
- If you haven’t already, immediately call in a heli rescue. Ask nearby people for help if needed.
- If you’re stuck in a location due to bad weather or other circumstances and a Gamow bag is available, use it.
HAPE Prevention
Just like HACE, HAPE occurs in less than 1% of trekkers. If you go slow and acclimatize properly when trekking to 4,000 - 5,500 meters, you’ll minimize the chance of encountering HAPE. It’s always possible but extremely unlikely.
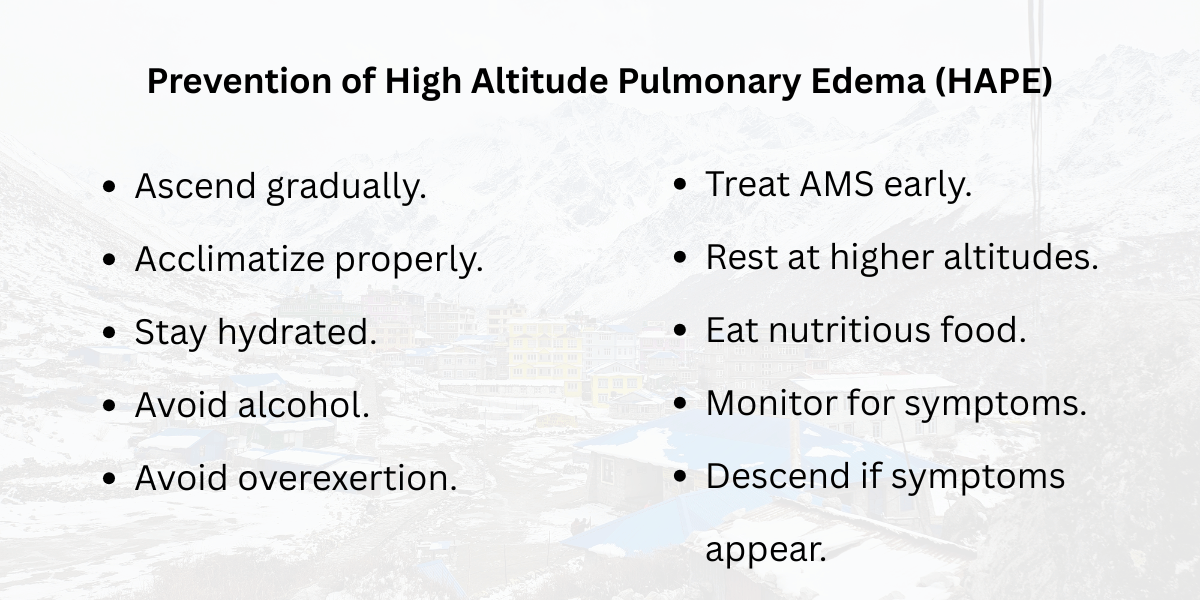
However, if you’re reckless, ignore symptoms, and keep climbing higher, the chance of getting HAPE spikes hard, and it may end up ruining your trip.
So take our advice - follow our AMS recommendations and use a well-designed itinerary.
Travel with a well-trained guide or experienced team member. They should be able to recognize any symptoms and tell you to stop ascending or help descend if needed. They should also be able to handle first aid and coordinate a rescue in the worst case.
What Exactly Causes Altitude Sickness?
I’ve already given you a general idea of why altitude sickness happens. Low oxygen causes a bunch of negative changes in your body, and the intensity can range from light to extreme.
In this section, I’ll explain the exact cause and mechanisms in detail.
The Main Cause - Lack of Oxygen
All our organs and tissues need oxygen to work properly and to keep us alive.
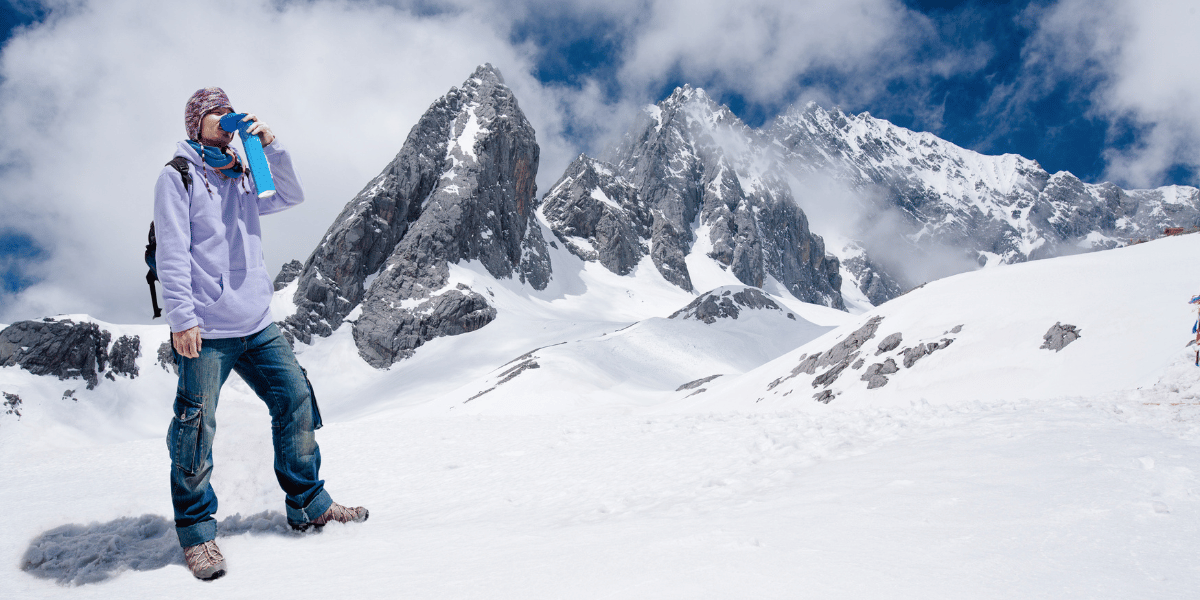
But the air at 3000 m is about 30% thinner and at 5000 m, about 50% thinner than at sea level.
Our body is always adapting to our surroundings. So, to compensate for this lack of oxygen (hypoxia is the medical term), our body starts to hyperventilate.
- Your heart and lungs have to work harder to supply more blood that contains oxygen, and you will notice that your breathing and heart rate increase. The kidneys produce more erythropoietin (EPO), with levels spiking at 24-48 hours. This signals the bone marrow to make more red blood cells, which carry oxygen.
- The faster you breathe, the more oxygen you take in, but you also get rid of lots of CO₂. This alters the acid-base balance of your body and makes your blood alkaline. This is called Respiratory Alkalosis and causes symptoms such as fatigue, nausea, dizziness, tingling, etc. It also increases the affinity of hemoglobin for oxygen (i.e., it limits oxygen release to tissues, which worsens hypoxia).
- Adaptation takes time. So, you’ll also notice reduced energy/fatigue, reduced ability to recover, disturbed sleep, etc. for now.
- The body suppresses hunger hormones like ghrelin and prioritizes blood flow to vital organs like the brain rather than non-critical parts like your digestive system. So, you might feel nausea or a loss of appetite.
- Additionally, hypoxia does a few things regarding fluid retention:
- It triggers the release of stress hormones and inflammatory pathways like HIF-1. These affect the sodium balance function of your kidneys and cause extra fluid retention in the body.
- It triggers widening of blood vessels to maximize blood flow to the brain. The rush of high-pressure blood can break the blood-brain barrier and leak fluid into the extracellular spaces of the brain's white matter. This causes swelling, which starts the headaches, nausea, and dizziness, and can progress to HACE if ignored.
- It triggers the opposite reaction in the lungs (i.e. HPV, where the blood vessels constrict to force optimal blood oxygenation). Unlike certain medical conditions, hypoxia makes your entire lung constrict at once rather than just some parts. This spikes the blood pressure in the lungs, which damages the capillary walls, which in turn leads to fluid leakage.
The Real Culprit - Rapid Ascent
So, are the changes described above inevitable? Is altitude sickness inevitable while trekking? Of course not!
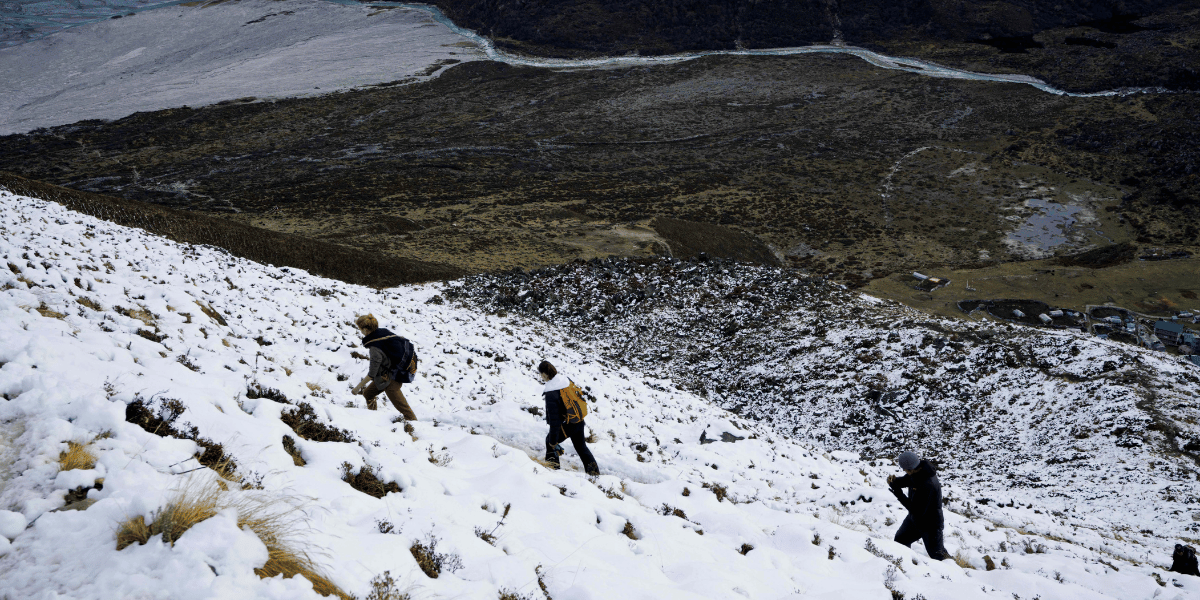
Hypoxia only causes those negative changes because your body hasn’t adapted yet.
If you go at a slow, comfortable pace and allow your body to acclimatize properly, you can finish your Langtang trek with zero symptoms, or very light ones at most.
I’m not asking for an unreasonable amount of time either. Follow our recommended itineraries and add 1-2 acclimatization/exploration days if needed. That’s it, 1-2 extra days and you’ll have a great trip with nothing to worry about!
But people want to finish their treks in the least amount of time, and they ignore all the signals and alarms their bodies are raising to do so.
To reiterate, this is the actual trigger that’s within our control - the rate of ascent. Go slow and listen to your body. It’s not a race!
Genetic and Other Components
There are a few other minor factors that affect your chance of getting altitude sickness. Most people don’t need to worry about these, but I thought I’d still mention them at least:
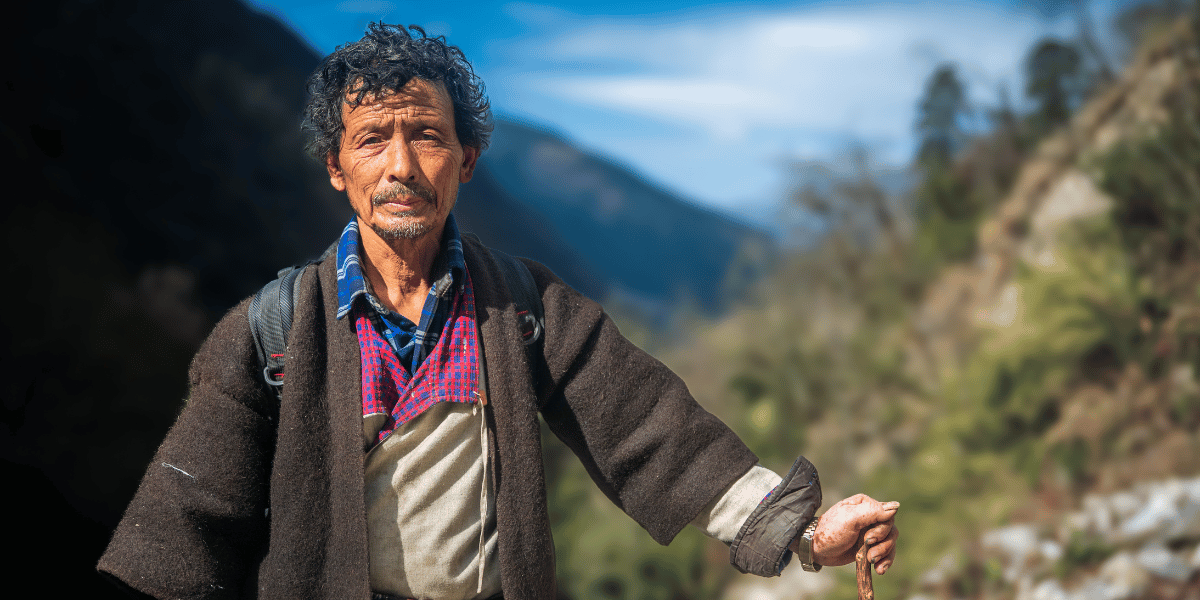
- Genes - Genes like EPAS1, ACE, HIF-1, etc regulate the body’s response to hypoxia and level of blood pressure, fluid balance, and RBC production. This is most clearly seen in indigenous people of high altitude regions like the Himalayas (e.g., Sherpas) or the Andes. The locals often acclimatize faster/better because their genes have adapted for this environment over hundreds or thousands of years. But while this is a major advantage, it’s not really something we can control, so don’t worry about it. Just go at a pace comfortable for you.
- Max Elevation - Humans (even high-altitude natives) haven’t evolved to survive over 5000-6000 meters long term. Especially if you’re peak climbing above 6,000 m, your body is actively failing, and you’re on borrowed time. So, even with good acclimatization, there’s a chance of rapid altitude sickness. For most Langtang treks, you don’t need to worry about this. But if you’re doing any high-altitude passes or peaks, do keep this in mind.
- Previous History - Previous history of altitude sickness is one of the best resources you have to gauge your body’s ability to adapt to altitude and likelihood of getting sick again. For HACE/HAPE specifically, it’s a bad thing, though, because suffering from these conditions increases the risk of recurrence.
- Re-entry HAPE - If you’ve finished a trek or climb in another region, stayed in Kathmandu for a few days, and are looking to fly or rapidly climb in the Langtang region, exercise caution. Re-entry HAPE affects a small number of people who do exactly this.
- Underlying Health - Underlying health conditions generally don’t make you more likely to get altitude sickness. But they CAN make it more difficult to manage. For instance, you may be restricted from using certain meds. Heart and lung conditions might make it harder to tolerate hypoxia. Anemic people might acclimatize slower or feel the symptoms more intensely - you get the idea.
Top 10 Altitude Mistakes Trekkers Make
Local, foreigner, athlete, out of shape, experienced, first-timer, young, old - none of that matters. Professional guides have died of altitude sickness in the Langtang region, and plenty of little kids have finished treks with perfect health.
What’s most important is to avoid obvious mistakes like these:
- Going too high too fast without regard for acclimatization is the #1 mistake trekkers make. I mainly see this done by first-time hikers who don’t realize altitude sickness can be a serious threat.
- Ignoring early symptoms and pushing on is the 2nd most common mistake. I typically see this one done by clueless beginners too. Yes, a light headache or loss of appetite is common. But that doesn’t mean you completely disregard them. Instead, monitor them and stop ascending if the symptoms are worsening or not improving or descend when needed.
- Thinking you’ll be fine with medicines. The only way your body can acclimatize properly is with enough time at altitude. Don’t think you can rush ahead because you’ve taken some meds like Diamox. Similarly, for extreme cases like HACE/HAPE, don’t think meds are the cure. They can only buy you time; the actual cure is to descend to a safe altitude.
- Climbing superfast because you’re fit. Don’t think the rules of acclimatization don’t apply to you just because you’re young and fit. While you might find the climb easier than most people for a few hours, you’ll feel the effects severely in the evening or the next day. This is because overexertion and sleeping at high altitude on day 1 both make it harder to acclimatize.
- Being stubborn until it’s too late. I see this manifest too often as a mix of all the previous points. People trek fast and ignore the symptoms or think they’ll be fine because they have meds. When the symptoms get worse, they refuse to descend because they don’t want to ruin their itinerary and they think they’ll handle it. Ultimately, they become severely ill and need to be rescued.
- Skipping acclimatization days. This is especially important if you’re trekking for multiple days above 4,000 m. You can’t keep climbing every day at this altitude, as your body can’t acclimatize fast enough. Generally, it’s good to take a rest day after every 1,000 m of elevation gain. It doesn’t have to be boring; explore the areas nearby but return to a similar altitude for sleeping.
- Hiding symptoms. This ties into some of the previous points. On group trips, people sometimes hide their symptoms because they don’t want to cause delays or ruin the group’s plans and atmosphere. This typically leads to bigger problems down the road, so just be honest and don’t hesitate to ask for help.
- Drinking alcohol on the ascent. Some booze while returning is not a big deal; after all, you’re on a trip, and you gotta have fun. But strictly avoid it when you’re climbing up. It suppresses your breathing, prevents deep sleep, masks symptoms, and dehydrates you, all of which lead to poor acclimatization.
- Skipping meals. We typically burn 3,000 to 5,000+ calories a day while trekking in Nepal. That means, even with our typical eating habits and some extra snacks on top of that, most of us are still in a big deficit every day. If you start to skip meals because you don’t have an appetite, your energy levels will drop super hard super fast, and your joints and muscles will have a hard time recovering. It doesn’t have to be Dal Bhat. Candies, pizzas, yak burgers, french fries, hash browns, cake, pastries, sandwiches, momo - eat whatever you can find that suits your appetite. But do eat!
- Neglecting hydration. While trekking, our bodies sweat and lose a lot more fluid than most of us realize. If you only drink water when you feel like it, you’ll be dehydrated after a day or two. Take fixed hydration breaks every 30-60 minutes and ensure you drink at least 3 liters of fluid a day. 3-5 liters is ideal depending on your bodyweight. I also recommend at least one electrolyte mix/sachet a day for most people.
Besides these, I’ve also seen a few other general mistakes that people make at altitude:
- Sunburn. As UV radiation is a lot stronger at altitude, your skin burns comparatively faster compared to sea level. It gets more intense on reflective surfaces like a lake or snow. Make sure to not neglect sun protection, especially for your eyes. Sunburnt skin can be painful, but snowblind eyes are a whole different level of pain and danger.
- Confusing general fatigue or dehydration symptoms with altitude sickness. I’ve seen people try to fix their health issues with Diamox and fail because the problem was poor nutrition and dehydration the whole time. The symptoms can seem similar, so I don’t blame them. But regardless, have all your bases covered - eat and drink well and go slow. And don’t only drink lots of plain water because when combined with the physical exertion and sweating, this can cause hyponatremia (low blood sodium) and worsen the symptoms. Instead, have some electrolytes with your water.
- Using remedies as a replacement for acclimatization. A few times, I’ve seen people use portable oxygen cans or Dex to help them climb. This is the exact opposite of what these things are meant for. They should be used to stabilize you and help you descend during emergencies. Using them to climb is just asking for trouble.
- Not carrying proper meds and first aid gear. Some people don’t carry any meds/first aid gear at all. Others blindly get some drugs from a pharmacy in Kathmandu without understanding who should use them and when. You may be allergic to some of these drugs and get adverse side effects, especially if you combine drugs that should NOT be used together. Don’t use meds carelessly; consult with your doctor before the trip.
- Travelling alone without any rescue protocol prepared. Always remain in contact with a trekking operator, guide, friend, or family member in the city or back home. In case you need help, they should be able to help you with your condition, guide you to a nearby safe location, or call for/co-ordinate a rescue.
- Skipping insurance. Recently, my friend’s friend had to be heli rescued due to HAPE. But she had to pay the heli charge upfront in cash, as she didn’t have insurance. A lot of countries have alpine clubs where a cheap membership includes perks like heli rescue and medical insurance up to 6000 meters. If not, there are many reputable insurance companies that operate worldwide. Insurance isn’t mandatory, and you can certainly get away without it. But having a safety net is nice because international visitors are susceptible to a lot of issues in Nepal, from stomach bugs and food poisoning to dry cough, altitude sickness, and physical injuries.
Seasonal Impact in Altitude Sickness
None of the seasons directly cause altitude sickness. But they can change the environmental conditions drastically, which can make altitude sickness a bit more likely and a bit harder to manage.
For instance, monsoon trekking can be both physically and mentally exhausting as you’re constantly wet and battered by the rain.
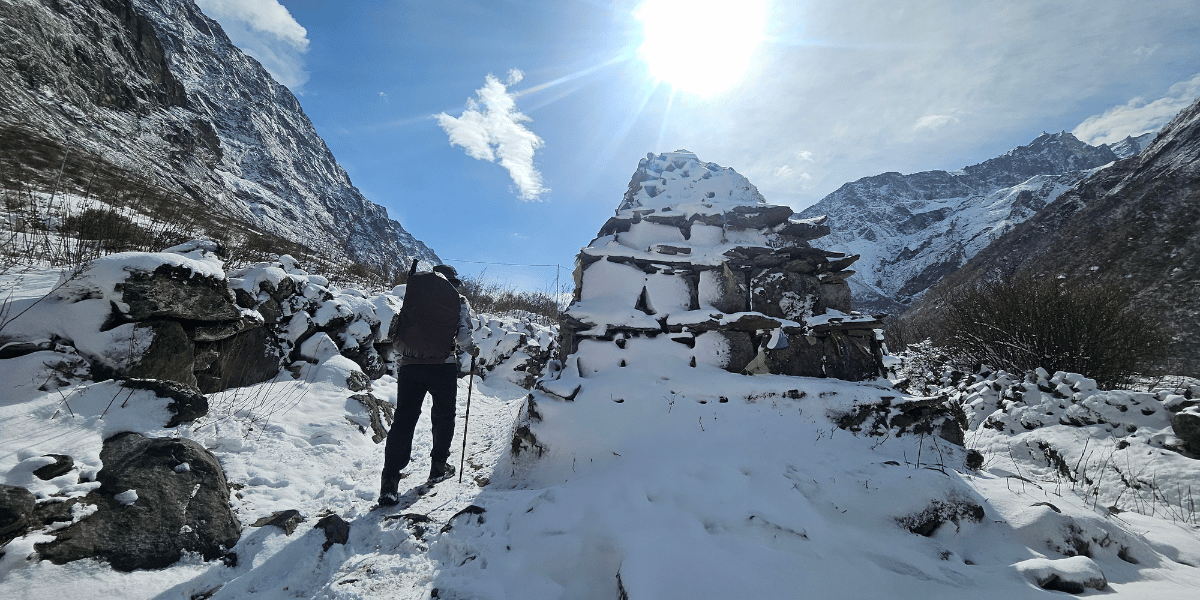
Winter’s freezing temperatures and dry air cause extra cardiovascular stress and faster dehydration.
In such tougher conditions, you will be more stressed, have reduced general immunity, and be more susceptible to common illnesses like a cold.
Overall, all such factors can combine to make altitude sickness slightly more likely and harder to manage in tougher seasons compared to pleasant ones.
Tips to Prevent and Tackle Altitude Sickness
I’ve explained plenty about the main things to do and biggest mistakes to watch out for to prevent altitude sickness. Here are some extra tips to help avoid/tackle it:
- Climb high, sleep low. You’ll see this in many of our Langtang itineraries as well. We might hike up to Kyanjin Ri (4,400 m) for the sunset, but we’ll get back to Kyanjin Gompa (3,890 m) for the night. This approach ensures we get a good night of sleep and helps us acclimatize better for the next day.
- If you’re concerned about altitude sickness with your planned itinerary, consult with your doctor regarding Diamox/Acetazolamide. Assuming Diamox is safe for you with no side effects, using it preventively can help you acclimatize faster. It adjusts your blood pH level accordingly and helps you take in more oxygen with deeper, more frequent breaths.
- Prioritize recovery. Force yourself to get in enough nutritious food, fluid, and sleep even if you don’t feel like it. Otherwise, the fatigue and lack of rest will compound and lead to very poor acclimatization.
- Keep yourself warm. Lower body temperature increases hemoglobin affinity for O₂, whereas higher temperature means O₂ is more readily released to the tissues. Additionally, your body doesn’t have to divert oxygen/energy towards shivering and vasoconstriction if you’re warm. Practice good layering, and keep a warm water bottle in your sleeping bag if needed. Minor details, but they add up.
- Avoid sleeping pills. Many of them suppress your breathing, which is the opposite of what you want in a low-oxygen environment.
- Use the Lake Louise test if you suspect altitude sickness in yourself/a team member but are not sure. Combined with other tools like a pulse oximeter, it’s one of the best ways to diagnose and keep altitude sickness in check.
- Go with a reliable guide and trek operator. Someone who’s trained and experienced in this domain can help you prevent altitude sickness altogether; notice the signs in the early stages; help you manage it best; and rescue you in the worst cases.
What To Do If You Develop Altitude Sickness
On the Langtang Valley trek, the lightest symptoms typically pop up between Ghodatabela (3,008 m) and Langtang Village (3,455 m). At viewpoints like Upper Kyanjin Ri (4,700 m) or Tserko Ri (4,985 m), light to mild symptoms are very common.
You’ll notice the same trend on most treks in the region - the higher you go, the more common the symptoms. So don’t panic if you’ve noticed some symptoms!
- Ideally, you’re travelling with a trained guide, and they will handle everything for you. They should always be communicating with you about how you’re feeling, notice any early signs, help manage any light-to-mild symptoms, help you descend if things get worse or the symptom is not improving, and coordinate evacuation with your trek operator/insurance provider if things get really bad.
- If you don’t have a guide, ask your friend/team member for help with the same things - monitoring your condition, descending, evacuation, etc.
- If you’re travelling solo, ask the locals and hotel owners for help with the same things.
Whether you’re alone or with a team, the steps to take are the same things I’ve recommended time and again throughout this article:
- Monitor your condition and don’t let things get any worse than they already are.
- Stop ascending and rest at the nearest village.
- Descend if needed. On foot, with a horse or a porter, whichever is appropriate.
- Keep yourself well-fed, hydrated, and well-rested.
- Use portable oxygen to buy time if necessary.
Emergency Response and Rescue Options in Langtang
In Langtang, most of the high-altitude trekking spots are accessible for heli rescue.
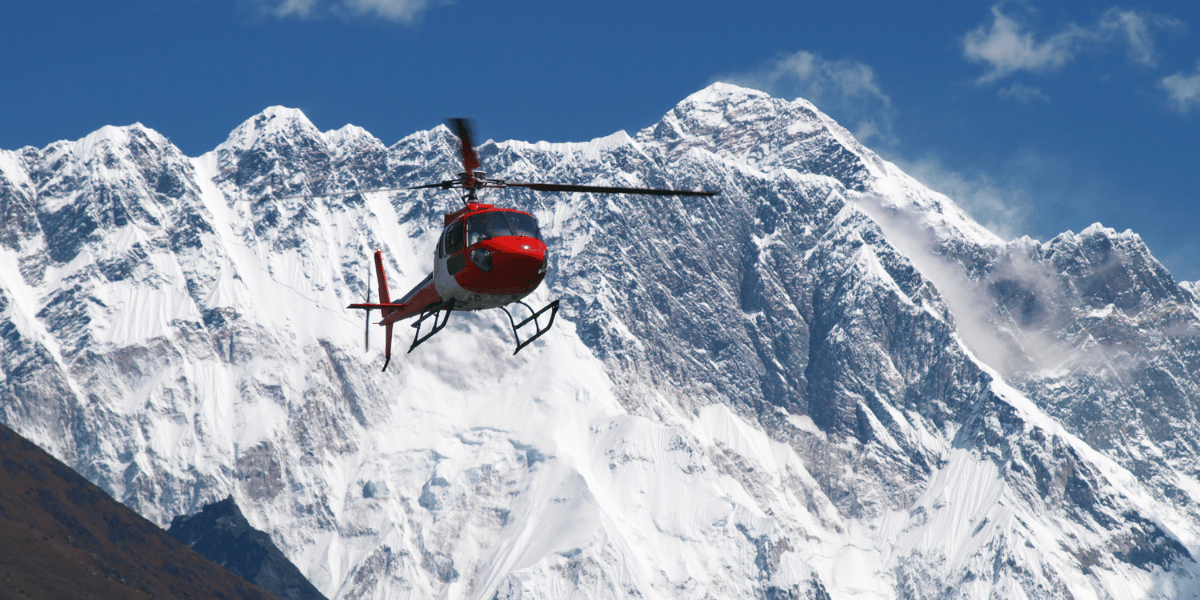
Similarly, there’s a health clinic in Mundu and army checkposts throughout the region.
So, if you feel very sick or you suspect HACE/HAPE, you should start your emergency response immediately.
This could mean descending down to the nearest checkpost/clinic. Or getting in touch with your insurance provider/contact in the city and calling in a heli rescue.
You should also inquire with locals, hotel owners, and other trekkers regarding portable oxygen and emergency meds. But remember that these are not a cure; they only buy you time to descend.
Final Thoughts: Should You Worry About Altitude Sickness In Langtang?
At this point, some of you might be worried about getting altitude sickness in Langtang and ruining your trip, or potentially even putting your life in danger.
But I’d like to draw your attention to the main point I’ve been repeating throughout this article.
If you follow our recommendations (aka good acclimatization and high altitude trekking practices), you do NOT have to worry about altitude sickness. If any light symptoms pop up, you’ll be able to monitor and manage them easily!
The best way to ensure this is to let a reputed and experienced operator like Altitude Himalaya handle the details for you. We’ll manage everything from any altitude sickness concerns to trip planning and permits.
Check out our detailed Langtang guides and drop us an email or a message on WhatsApp if you need help with any inquiries, trip preparation, or on-the-field support!


 Anup Thapa