Layers. This is one word that you need to keep in mind while packing for a trek, be it Langtang National Park or any other region. And when I say layers, this applies for clothing as well as skincare. But that alone is not enough to guide you, and this is why I have written this blog.
While packing for your trek, you need to keep various things in mind; the weather, the change in altitudes of different places in Langtang, the season, and so on. Similarly, you should also know the number of each item you need to carry based on the duration of the trek.
And once you get the idea of all the things that you will have to pack, you will be met with the actual difficult part of the trek. Making everything fit in your trekking bag. And while trekking, packing is not about making things fit; it is also about placing the right things at the right part of the bag.
So make sure to read this blog to the end to learn every aspect there is to packing.
Quick Packing Checklist for Langtang Trek
Here is a quick packing checklist for you to refer to if you are running short of time. You can print this out and use it while you go shopping for your trek or when you start packing.
- Trekking Bag
- Daypack
- Base Layers (lightweight tops, thermals, and undergarments)
- Mid Layers (trekking pants, fleece jackets, lightweight down jackets, shorts)
- Outer Layers (hardshell jacket and trekking pants, heavy downjacket)
- Footwear (trekking socks, trekking boots, slippers/sandals)
- Gears and other accessories (trekking poles, crampons, sunglasses, headlamps/torch)
- Skincare and toiletries
- Snacks
- Electronic devices and chargers
- Additional layers for warmth (woolen cap, cap, gaiters, gloves)
- First-aid kit
- Permits and necessary travel documents
- Sleeping bag (in case of camping) or a liner (for warmth and comfort)
If you don’t want to carry all these items on your flight to Nepal, then please note that you can buy or rent hardshell layers and trekking gear in Kathmandu.
Full Packing List for Langtang Treks: What You Need
Now that you have the checklist in your hand, in this section you will learn why each item is necessary. Read the details carefully so you do not end up with wrong and uncomfortable materials.
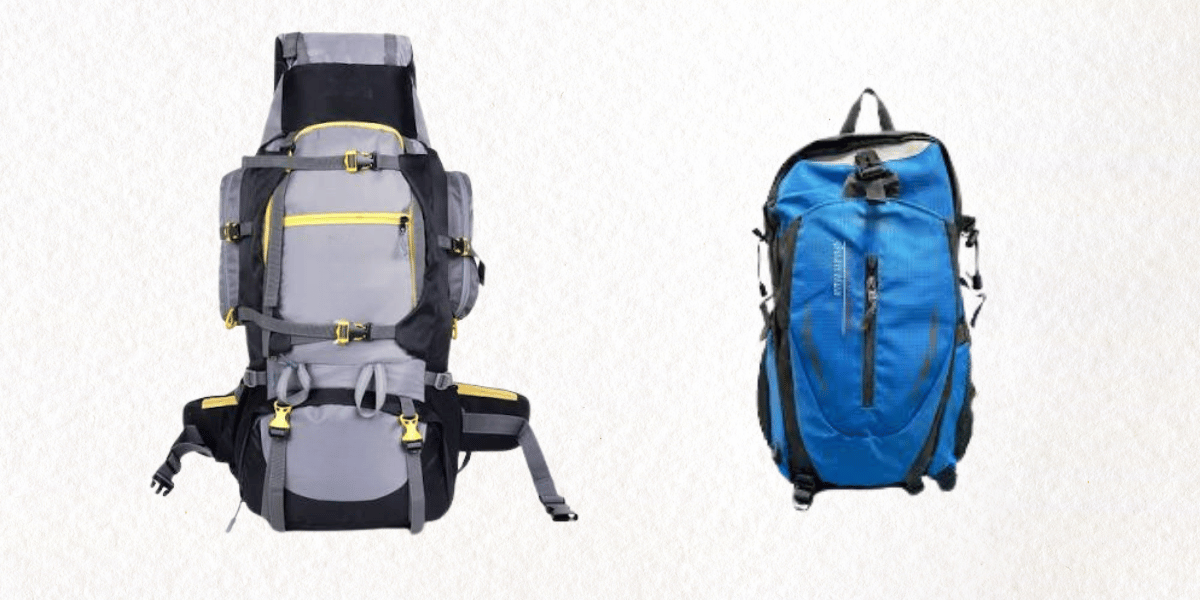
Trekking Bag and Daypack
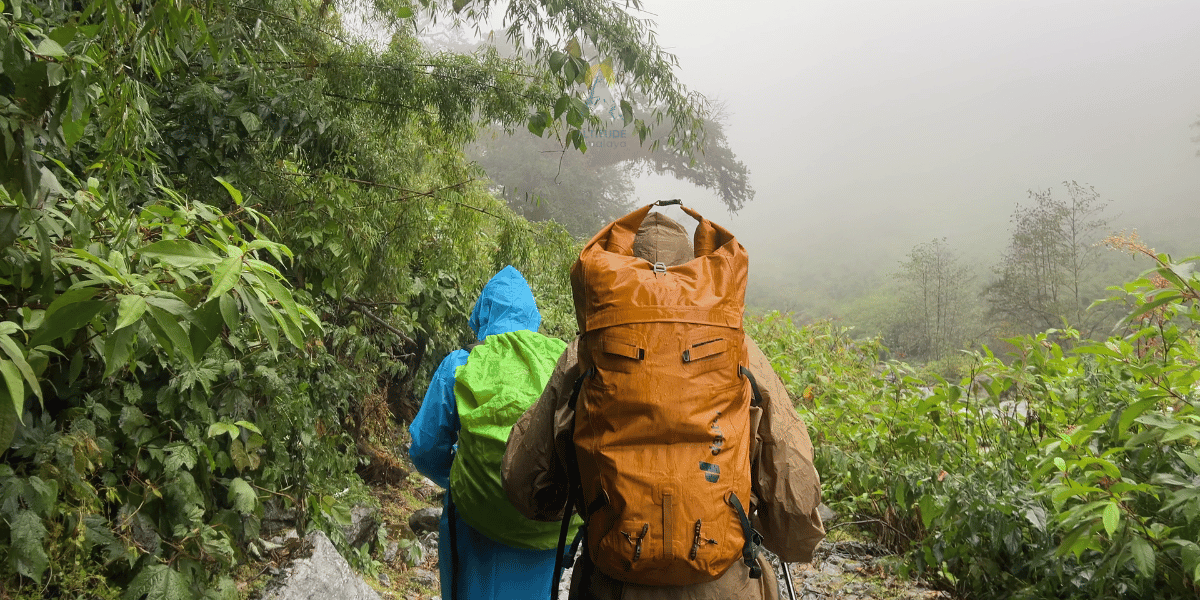
I don’t think I have to explain why you need a trekking bag. I mean, it’s where all the items mentioned below go inside. Just make sure that your trekking bag is waterproof and comes with a separate raincover.
Rainfall and snowfall are unpredictable in early spring and late autumn. And apart from your belongings getting wet, water and snow can also damage your electronics and travel documents.
And don’t forget to look for a trekking bag with an in-built back support and adjustable straps. They ensure that the bag is placed at the right part of your body, helping you maintain your center of gravity and balance while walking in rugged terrains.
As for your daypack, it’s a small backpack where you carry your essentials during a side trek. Your daypack, too, should be waterproof and big enough to fit things like water bottle, sunscreen, caps and gloves, and packed lunch (if necessary). These are the things you’ll take with you when going for the major attractions.
Clothing and Footwear
Let’s start with a detailed explanation of all the layers (base, mid, and outer) and footwears, and the specific items you will need that fall under these categories.
Base Layers
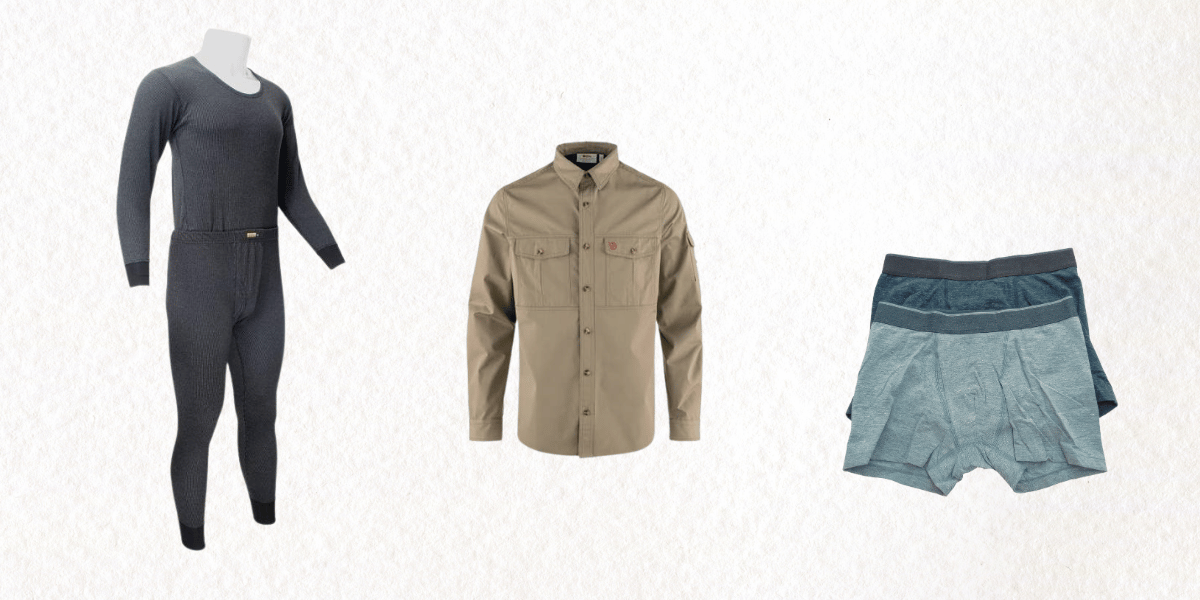
- Thermals: When it comes to thermal layers, you will need both the top part and the bottom part. While most people only bring them out of the wardrobe in winters, thermals are a must when you go trekking, especially as you approach regions closer to the mountains.
Because when the temperatures drop below freezing, both movement and sleeping can feel like a task. And thermals are designed to trap your body heat and keep you warm in the cold.
When it comes to picking the right thermals, make sure that they are either made of merino wool or synthetic blends like polyester. Your cotton thermals are not ideal for trekking, as cotton is not a fast-dry material, nor is it odor-resistant, a must when you have to stay active for hours.
- Lightweight tops: Again, when picking a lightweight top, cotton has got to go. Because it neither absorbs the sweat nor dries quickly, qualities you need in your trek clothes.
So the best options you have in hand are merino wool, nylon blended with elastane, and polyester. Known for moisture wicking qualities, they absorb the moisture and excess heat from your body and push them to the outer surface of the cloth.
Because the worst thing that can happen is your thermals getting soaked by the sweat and moisture trapped by your top.
- Undergarments: Once again, the same materials suggested for lightweight tops apply for undergarments. You can also add lycra to the list, as the material is flexible and excellent to support movement.
For women, they are recommended to wear sports bras that are made of spandex, nylon, or polyester. These materials are moisture wicking and women do not have to compromise with movement while getting proper breast support.
Mid Layers
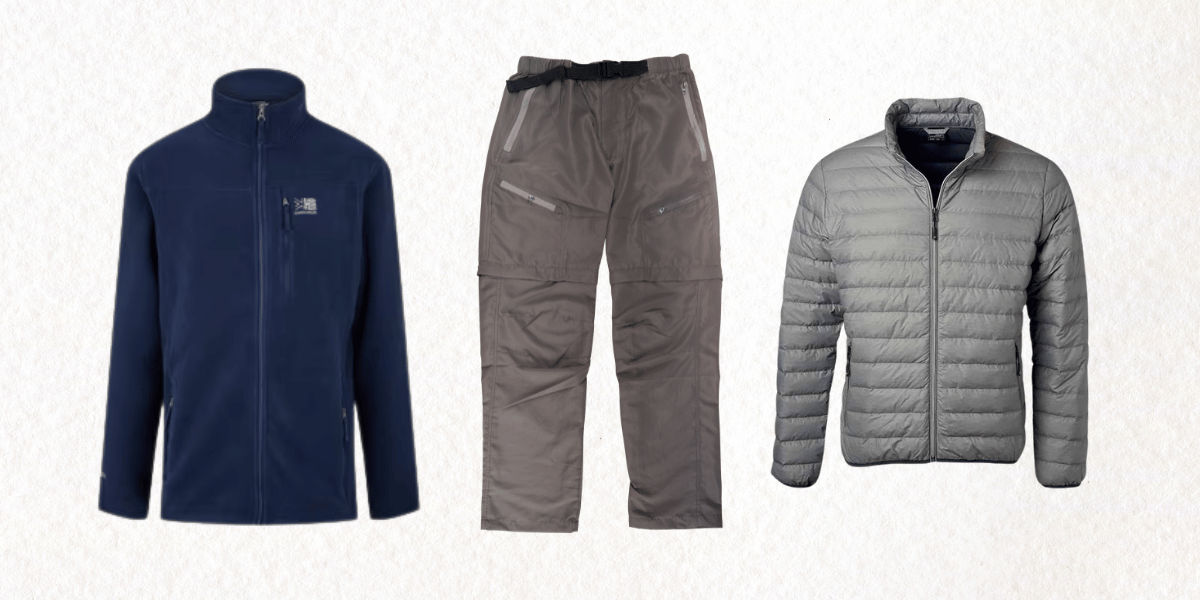
- Fleece Jackets: Often mistaken as a winter essential, fleece jackets are actually one of the lightest mid layers that can be worn throughout the year. Typically made from polyester, fleece jackets have thermal properties but they are breathable at the same time.
- Lightweight Down Jackets: Down jackets are basically jackets that are filled with either natural down feathers or high-tech synthetic insulation. Unlike a heavy down jacket, lightweight jackets can also be worn for mild weather. They are compressible and easy to pack, yet they have insulating properties similar to those of thermal wear.
- Trekking Pants: Your mid layer trekking pants should be breathable, lightweight, and sweat resistant. By now, I’m sure that you can tell that the main purpose of all mid layers is insulation. Make sure that they are stretchable and easy to walk in. Lastly, avoid cotton at all costs.
Outer Layers
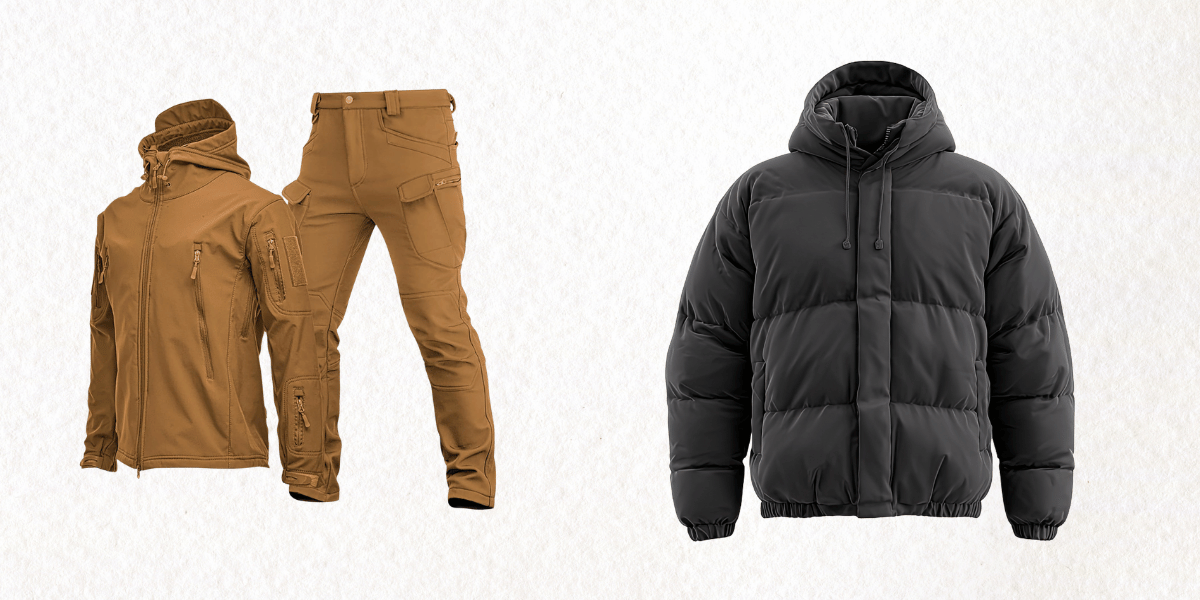
- Hardshell Jackets: Wind, rain, or snow, your hardshell jackets should keep you safe from extreme weather conditions. The outer layer of the hardshell jacket is more stiff compared to softshell jackets.
When water is poured on the jacket, you can see it dripping instead of getting absorbed. However, the material is breathable and allows the vapour from body’s moisture to escape from inside.
So the waterproof part, the outer lining, is made of materials like expanded polytetrafluoroethylene (ePTFE) or Polyurethane. Based on the quality, your hardshell jacket is also expected to be tear-resistant.
- Hardshell Trekking Pants: Your hardshell trekking pants are made from the same materials as hardshell jackets. Both clothing items protect you from harsh weather.
Additionally, working as the shell of your clothes and your body, both items also play a notable role in protecting you from injuries. Your pants should not be tight and fit on top of your mid-layer trekking pants.
- Heavy Down Jacket: When buying a heavy down jacket, you need to ensure that the jacket has more than 300 gms of down combined with high fill power (warmth-to-weight ratio). This indicates that the jacket has higher insulation property compared to lightweight down jackets. These jackets are comfortable and easy to pack, somewhat lighter despite their fluff. However, most of the heavy down jackets are not waterproof, so do not carry them as a substitute for a hardshell jacket.
Footwear
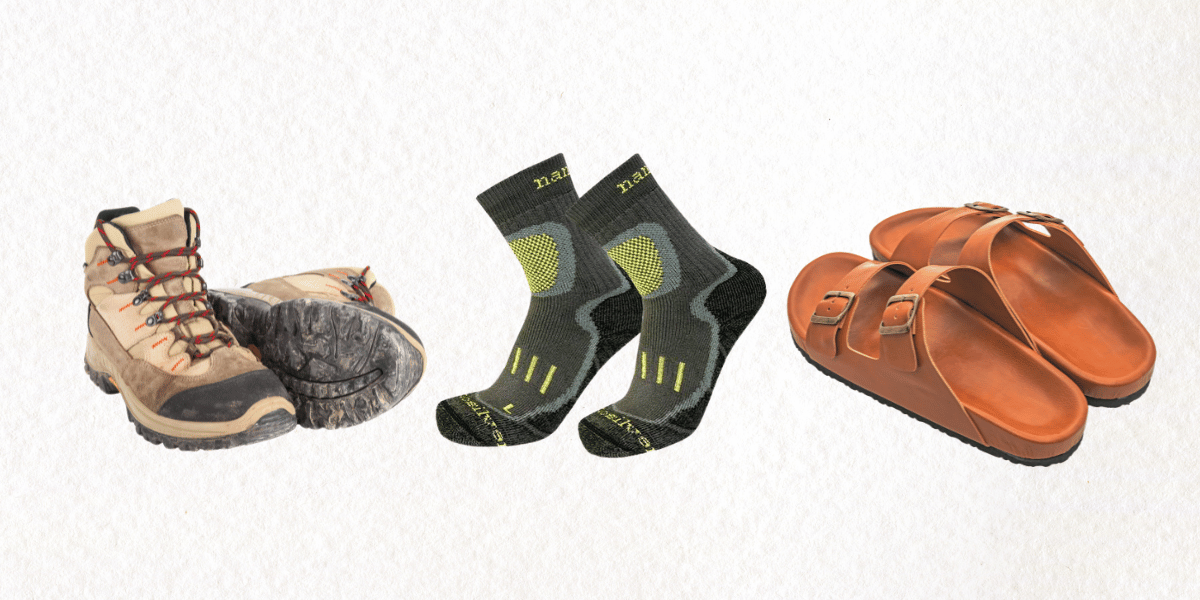
- Trekking Socks: Unlike regular socks, trekking socks work as a protector from blisters and are meant to be compatible in different temperatures. The best materials for trekking socks are merino wool and coolmax.
Your trekking socks should be odor resistant, as you will be walking for hours wearing trekking boots. Also, make sure that they are moisture-wicking and quick-dry.
Make sure the length of your socks go above your ankles, as you do not want debris getting in. While wearing them, you should feel the cushioning on your heels and toes, avoiding friction against the boots.
- Trekking Boots: The best view comes with the toughest walk, and the toughest walk requires the best trekking boots. And when it comes to trekking, your boots need to provide remarkable ankle support, should be waterproof, and fit you perfectly.
Not to mention, your trekking boots need to have deeper lugs for better grip against the rugged terrains of Langtang. And make sure that they have proper cushioning. Cushioning protects your legs from the impact that is constant during descents.
Rigid boots are more likely to give you blisters when you wear them for the first time on the trek itself. This is why you are advised to wear your new trekking boots while preparing physically for the trek so that you can break them in.
- Slippers or Sandals: You won’t be wearing slippers/sandals while trekking, so there are no specific types that you should be carrying. They will be mostly worn inside teahouses or when you explore the settlements or towns.
However, since roads and stone pavements can be slippery after rain, slippers or sandals with rubber soles can never go wrong.
Gears and Other Accessories
Gears and accessories make the trek easier and protect you from avoidable injuries and discomfort. While some gear gives you support, others help with your vision; their uses depend on the weather and the altitude.
Read the importance of must-have gears you will need for your trek in the Langtang Region:
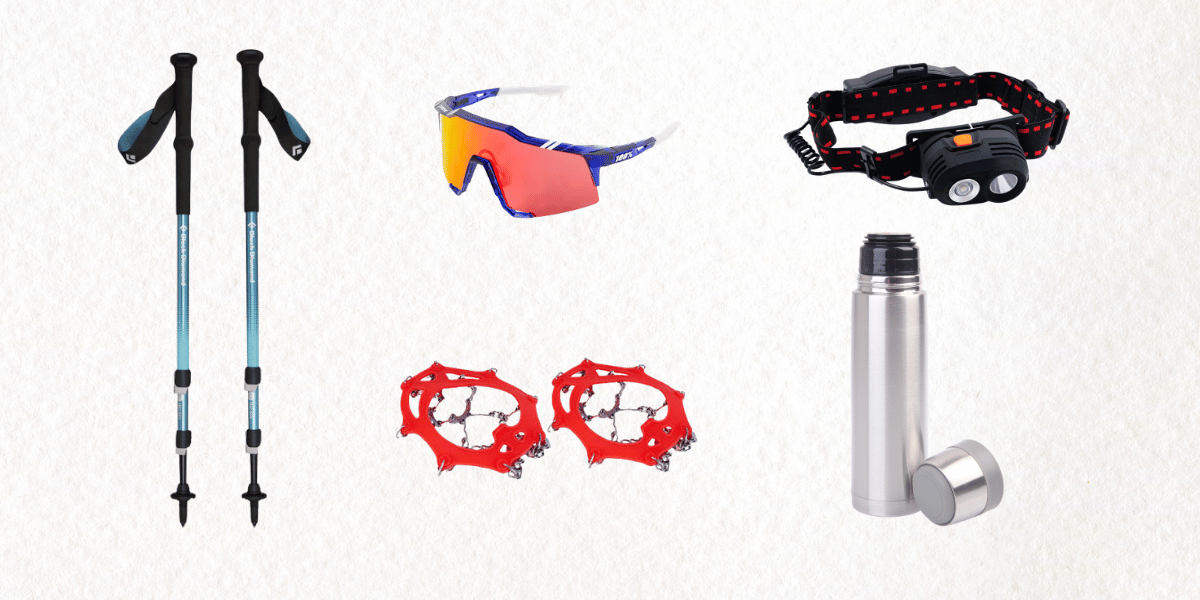
Trekking Poles
These are the essentials that you will need no matter which Langtang trek you decide, within Langtang and outside Langtang. A pair of trekking poles will significantly change the difficulty of the trek.
The rule is simple, the length of your poles should allow your elbows to form an angle of 90°. So when climbing steep terrains, the length of your poles should be, shorter and while descending, the length should be longer.
Adjusting the length allows you to distribute the weight of your body evenly on your legs and your upper body, removing the stress from your joints. You can also use your poles to check if the terrain particles are loose and to remove nettles from your way.
Trust me, certain trails are covered with nettles, and the last thing you want is to feel the sting!
Crampons
If you are trekking to high-altitude regions, then carrying a pair of crampons can help you in unimaginable ways, especially during early spring and late autumn when chances of snowfall prevail.
As for winters, crampons are absolutely necessary. The metal spikes on crampons are useful for walking in ice and snow to prevent slipping. While wearing the crampons, you need to place the spikes below the lugs, and the spikes should be turned towards the ground.
Sunglasses
No matter what season, sunglasses are a must-have. As you climb higher, even on gloomy days, you need to understand that the UV rays are strong. And after a heavy snowfall, you will need them to prevent snow blindness.
While buying sunglasses for trekking, you also need to make sure that the pair is durable. Furthermore, apart from getting polarized glasses, you should also check which category the shades fall under.
For trekking in Langtang, you can pick Category 3 or Category 4 glasses. While Category 3 is great for trekking, Category 4 is a must for climbing peaks. These glasses are known for blocking the light rays as well as harmful UV rays, ideal for safety against snow blindness.
Note: Category 4 lenses are exceptionally dark. Only wear them in intense, direct sunlight on snow.
Headlamps/Torches
Although you won’t be trekking in the night, headlamps and torches are required in case you run late or if you have to start a trek before sunrise.
However, headlamps are more convenient since your hands will be occupied with trekking poles. Just make sure to carry extra batteries no matter which device you choose.
Water Bottle and Thermos
These are two separate items that must be carried by trekkers. Your water bottle is to store or carry water of room temperature, whereas your thermos is for hot water.
You can surely buy mineral water bottles in the teahouses, but many trekkers throw away the empty bottles on the trail, polluting the national park. So make a wise decision and do not add to the waste.
If you are worried about the quality of water, you can choose to carry portable water purifiers adjacent to the bottle or water purification tablets.
Skincare and Toiletries
Just because you are going on an adventure does not mean that you have to live like savages. Skincare products and toiletries are as fundamental as your clothing items. You don’t have to carry your entire kit; just carry what’s needed.
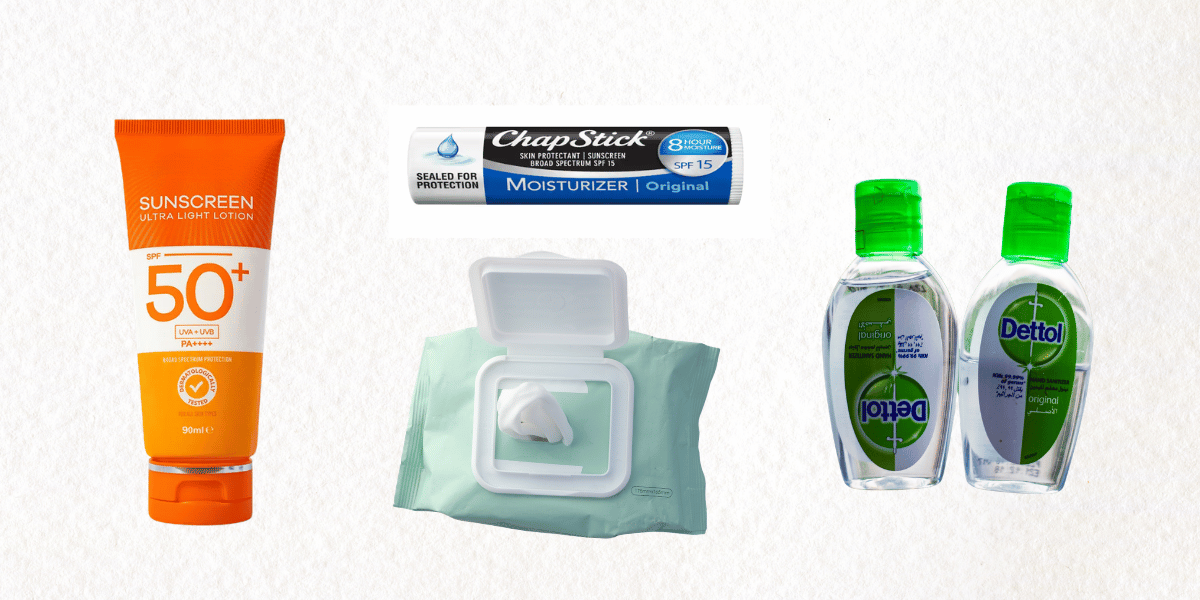
Here are some products that you cannot miss for your trek:
- Sunscreen and Moisturizer: Here’s my personal tip, get a 2 in 1 product, a moisturizer with SPF (50 PA ++++). Otherwise, you can get separate products, but they should be sweat resistant and non-greasy.
Against the cold and dry weather of high-altitude regions, you will need products that will protect your skin barrier. So make sure that they contain components that hydrate your skin.
- Chapstick with SPF: If you are protecting your face, don’t forget your lips. Dry weather mixed with high UV rays can cause chapped, sunburnt lips and discoloration.
- Wet Wipes and Tissues: In remote areas, water is not readily available. And in places where people rely on solar power for hot showers, hot water might not be enough for everyone. In these situations, wet wipe can be the closest option to a shower.
When buying wet wipes, pick unscented ones without alcohol. Alcohol and added fragrances can make your skin dry. These wipes can also be used to clean wounds in case you get minor injuries.
Carry tissues as well because buying them before the trek is always cheaper compared to buying them on the trail. Use them wisely and do not dispose of them in the wild. Instead, you can use a waste bag and throw them in teahouses.
- Hand sanitizers: You cannot expect to find soap and water in the wild, and it’s better not to pollute the stream. With regards to this point, carrying a hand sanitizer is a wise choice. Try getting one with moisturizing quality.
Apart from these, you should carry your toothbrush and toothpaste. Because oral hygiene is important for your overall wellbeing. You can also carry a small can of dry shampoo.
Snacks
Although the major trails have teahouses along the way, it’s normal for trekkers to feel exhausted midway. In such times, you will need snacks to energize you so that you can keep going.
But when it comes to packing snacks for the trail, you need to be mindful about your choices and pay extra attention to their nutritional value. Instead of packing snacks that are high on sugar content (especially refined sweeteners), you will need to find ones with the right balance of carbs, fiber, and protein.

Here are some healthy snack suggestions for you:
- Trail mix: There is no doubt that trail mix is one of the healthiest sources of energy for trekkers. With a mix of nuts, dried fruits, seeds, and treats, the right mix can energize you within a short period of time while ensuring the energy lasts for a long time. What's even better is that you can pick your own ingredients for your trail mix instead of buying a pre-mixed packet. This gives you more choice in case you are allergic to specific nuts.
- Granolas and Yoga Bars: These treats come in smaller packets, making it easier for you to pack. They have plenty of fiber and other nutrients that support your digestion apart from refueling your energy.
- Roasted Broad Beans and Fried Legumes: These are the saltier choices of snacks in case you want more options. Some of the most popular choices that you can prepare at home are chickpeas, soybeans, broad beans, and lentils.
Providing plant-based fibers, this snack is also suitable for vegans and vegetarians. Apart from adding salt, you can also add extra spices of your preference.
You can also get ready-to-eat noodles in Kathmandu. But since they have high sodium content, just make sure that you do not rely entirely on them.
Electronic Devices and Chargers
I cannot provide you a specific list of electronic gadgets, as it depends on you and the purpose of your trek. Most trekkers only come with their smartphone, while some carry their camera along.
While you don’t need any special permits for your personal camera, permits are required for filmmaking, commercial shooting, and drones. If you are carrying your personal camera, make sure to carry its chargers and batteries.
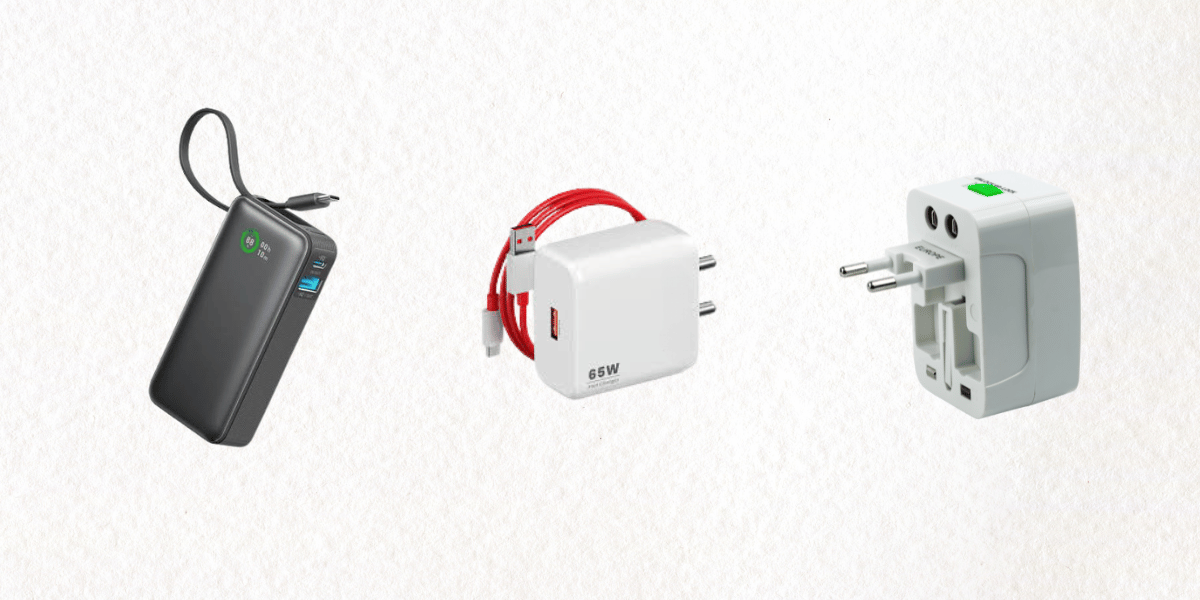
Here are other electronic gadgets that are a must:
- Power bank: A stable supply of power is a privilege in many parts of Langtang. So make sure to carry a power bank with you. A 20,000 mAH power bank should be good enough to charge your smartphone multiple times.
- Fast Charger: In teahouses where charging is only available in the dining area, a fast charger is going to be extremely helpful. Make sure that they are compatible with your other devices like GoPro and Kindle, if you are carrying them.
- Universal Adapter: The common power sockets found in Nepal are Type C, D, and M. So if your chargers are not compatible with these types of sockets, carry a universal adapter. If you are not sure, you can wait until you reach Kathmandu to buy them.
Warm Layers
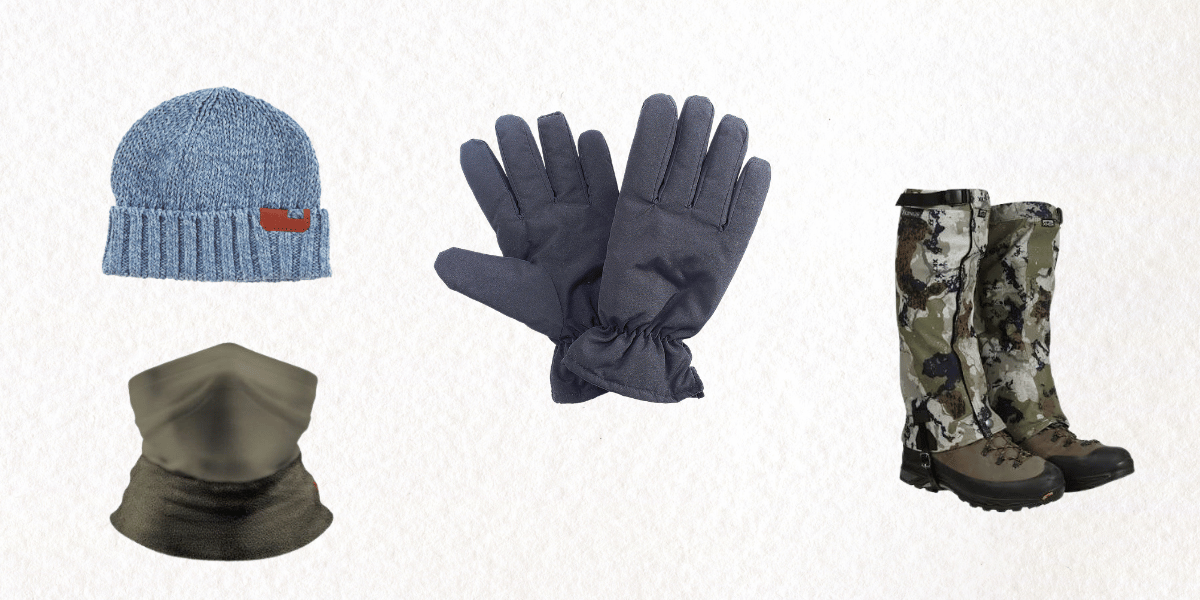
Apart from the clothing items mentioned above, there are some additional layers that you should carry. These layers are mainly suggested to keep you warm.
- Woolen beanie or Cap: Woolen beanie keeps your ears and your head warm when the temperature drops. You can also wear it if you are starting your trek early in the morning when it is chilly.
While caps might not keep you warm, they are the perfect choice to shield your face from the sun. In the afternoons, when it starts getting warmer, you can take off your beanie and switch to a cap.
- Gloves: You do not want to hold your trekking poles with bare hands when it's snowing or freezing cold. Which is why you will have to carry a pair of waterproof gloves with insulating properties.
- Gaiters (Neck and Legs): You can carry a neck gaiter as well as leg gaiters to stay safe from sun, snow, rain, and dust carried by the wind. While getting a neck gaiter, you can choose one made with merino wool or fleece. The point is, it should have insulation. When buying leg gaiters, you want lightweight and breathable material.
First Aid Kit
First aid kits are going to be lifesaving in case of emergencies, for you and everyone around you. If you have existing medical conditions, make sure to put your medications in the kit first. Apart from those, here are the remaining essentials you must carry:
- Bandaids and antiseptic cream: In case of scratches and wounds, make sure to clean the injury with water. Then apply the antiseptic cream, followed by the bandaid. Make sure that your bandaid is waterproof and breathable.
- Blister Bandages: Even the most experienced trekkers are victims of blisters. Sometimes the stiff boots are to blame; other times, it’s just the terrain and the friction. Your blister bandage should be waterproof so that it can stay in place despite the moisture. Also, check if it has hydrocolloid gel to coat the blister.
- Diamox: You cannot leave diamox behind if your itinerary includes high-altitude regions. Even if you don’t take it, keeping it in your kit can always be useful in case you start experiencing symptoms of altitude sickness. However, trekkers are always advised to take the medication at least 24 hours before ascending to high altitude (above 2,500 m). Consult with a physician regarding the dose and timings.
- Electrolytes: I guarantee you that electrolytes are lifesaving. Apart from providing you with energy, they also help in case of diarrhea. Carry plenty of pouches of electrolytes and keep some in your pockets or fanny packs so that they can be accessed easily.
- Paracetamol/Ibuprofen: Unpredictable weather can affect anyone. In case you get fever or experience severe muscle pain, paracetamol or ibuprofen will come in to save your day. However, you should not take it on an empty stomach.
- Metronidazole: In case of severe diarrhea, you can rely on metronidazole. However, it might react with other medications, so consult with a doctor before you get them.
- Bandages: Carrying an extra bandage can be useful if you get joint sprains while trekking. It will compress the sprain until you get proper medical attention. But don’t wrap it too tight because it might affect the blood circulation in that particular area. You can also use it to cover the wounds in case the bandaid’s adhesive wears off.
- Cetirizine: This is one of the best medications to relieve allergic symptoms. From rashes to runny noses, cetirizine can cure most of the allergic reactions.
Lastly, don’t forget to add a small card providing your name and emergency contact details. Also include details about your existing medical conditions.
Permits and Necessary Travel Documents
Langtang National Park is one of the protected zones in the Himalayas of Nepal, home to alpine forests and endangered species like red panda and snow leopard. Therefore, there are certain permits that visitors are mandated to get before entering the area.
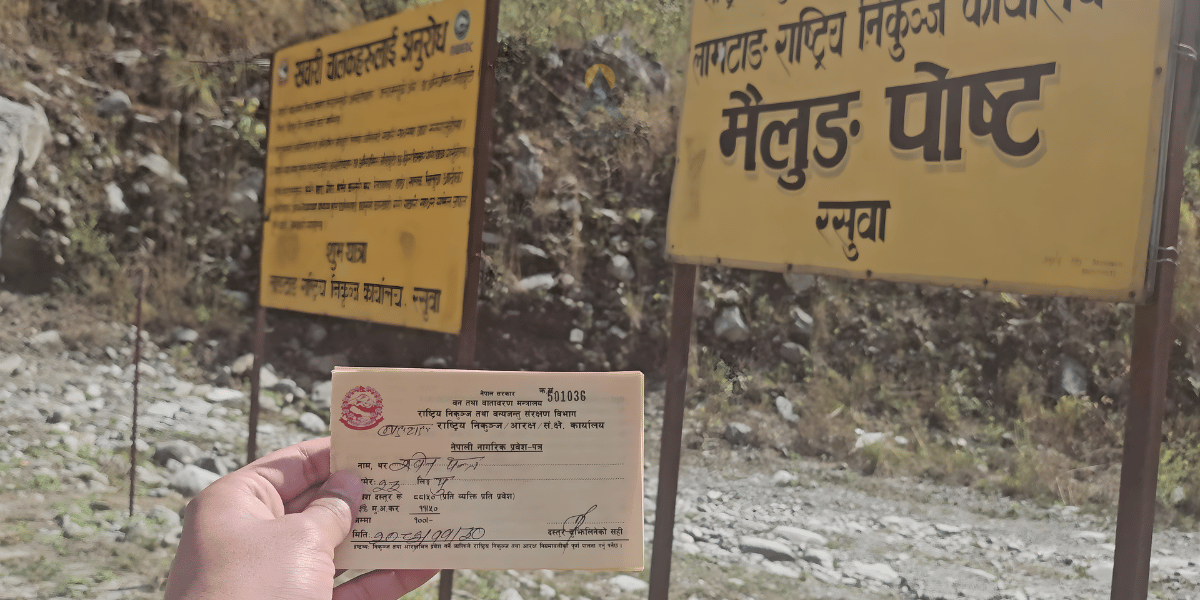
Here are the permits that you will need in order to trek in Langtang National Park:
- National Park and Conservation Area Entry Permit: This permit is mandatory for everyone entering the National Park and Conservation Area; both nationals and non-nationals are required to obtain the permit. Please note that the price of permits is higher for non-nationals. A conservation area permit is only needed for those trekking via Gaurishankar Conversation Area. Visitors are advised to apply for the conservation area permit in Kathmandu. As for the National Park permit, you can get it at the entry points. Both permits are valid for a single use and non-transferrable.
- Trekkers’ Information Management System (TIMS) Card: TIMS Card is mandatory for all trekkers, those who are travelling independently, in a group, or through a travel agency. This card is necessary to get your data so that you can be tracked in cases of natural disasters or medical emergencies. You can apply for it at the National Tourism Board (NTB) Office if you are trekking independently.
- Restricted Area Permit (RAP): Although there are no restricted areas within the Langtang National Park, while doing the Tamang Heritage Trail, you will have to enter Thuman, a restricted area. For that, you must apply for an RAP! Additionally, you are not allowed to trek independently in restricted areas, and the RAP can only be applied through a registered trekking agency.
- Filming and Drone Permit: If you are trekking across the region for filmmaking purposes with professional shooting gear, you will need to apply for a Filmmaking Permit. Furthermore, you cannot operate a drone in the national park without a drone permit. Applying for these permits is a lengthy and expensive process.
So if you are visiting for such purposes, it’s always better to reach out to a travel agency like Altitude Himalaya, which provides such services, or a local film production company to help you out.
- Official Identification Documents: When applying for permits, you will be asked to present your official documents like your passport and a valid visa. So if you plan on obtaining the entry permits at the entry points, make sure to carry them.
The information regarding all these permits has been covered in our blog Permits for Trekking in Langtang National Park, so please refer to it to get the updated details in depth.
Sleeping Bags or Liners
While most of the trekking trails of Langtang have developed the teahouse infrastructure, some trails (like Jugal Himal) are known for providing the raw experience of wilderness.
Although Panch Pokhari has teahouses along the way, their services are not as great as the teahouses you will find on the trails of Langtang Valley or Gosainkunda. Some places only provide mattresses for trekkers to sleep in. As for Jugal Himal, which follows the trail beyond Panch Pokhari, you cannot really expect teahouses on the way.
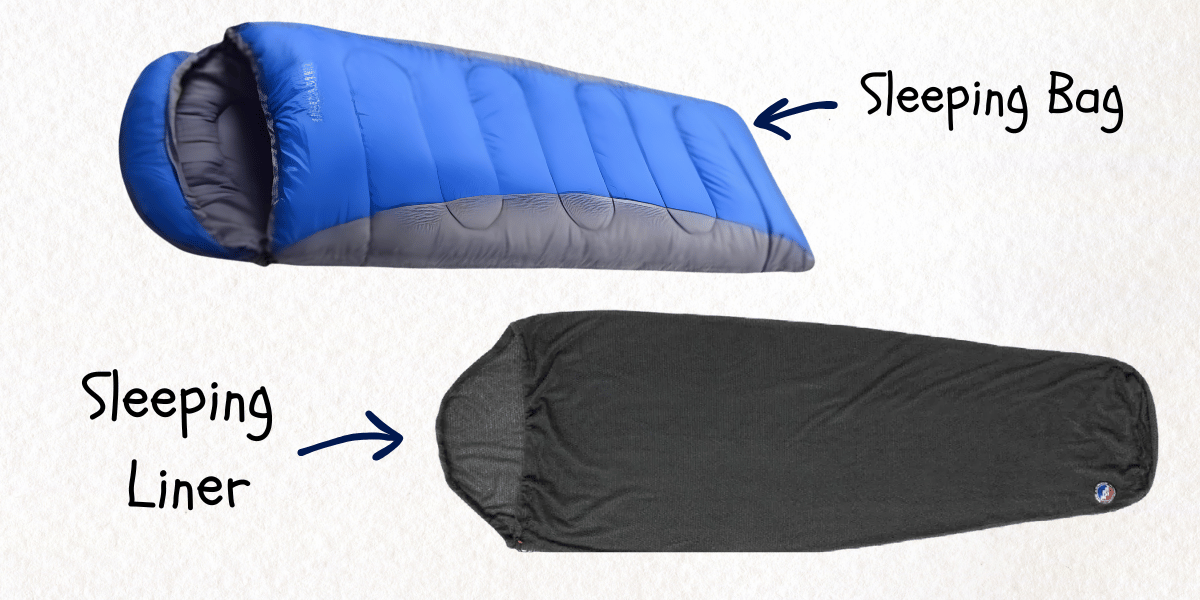
So make sure to carry a sleeping bag if you are doing these trails. In fact, the Jugal Himal Trek requires a complete camping setup. This is also applicable for Yala Peak’s base camp and summit.
For all the other trails like Langtang Valley, Tamang Heritage Trail, Gosainkunda, and Helambu Circuit, you will find decent beds and foam mattresses (might be stiff). So in such cases, instead of carrying the entire weight of the sleeping bag, you can carry a sleeping bag liner instead.
The liner will also add some comfort to the stiff mattresses and keep you warm when the temperature drops below freezing at night.
Trail and Duration Specific Packing List in Langtang
Your packing list changes according to the route, duration of the trek, and the season you trek in.
For instance, trekking at higher altitudes means that the cold weather will demand that you carry every single item of all three layers. But trekking in a lower altitude region could allow you to leave out some items from the outer layer.
We have divided the subsections below based on the trail and duration of the treks that have similar altitudes. You can refer to them based on your trekking trail and the season you are going for the trek.
As you go through the tables, you will notice that the number of few items increases as the duration gets longer. While the number of outer layers remains similar, the number of base layers increases. This is because you should not repeat your sweat-soaked base layers.
Not only do they increase the chance of hypothermia, but they also carry higher risks of infections and allergies. While a first aid kit, snacks, skincare and toiletries, and electronics are essentials, make sure to pack more if your itinerary is longer.
5 to 6 Day Treks
The trails of Langtang that you can cover in 5 to 6 days are Langtang Valley, Tamang Heritage (excluding Langtang Valley), Gosainkunda, and Panch Pokhari. Based on their itineraries, here are the number of items from the packing list that you have to carry for the trek.
|
Categories
|
Items
|
Number of Items
|
|
Base Layers
|
Thermals
|
1 pair (top and bottom)
|
|
Undergarments
|
5 to 6 pairs (exact days of the trek, lesser if you are washing and rewearing)
|
|
Lightweight Tops
|
2 or 3 tops
|
|
Mid Layers
|
Fleece Jacket
|
1 or 2 jackets
|
|
Lightweight Down Jacket
|
1 jacket
|
|
Trekking Pants
|
1 or 2 pants
|
|
Outer Layers
|
Hardshell Jacket
|
1 jacket
|
|
Heavy Down Jacket
|
1 jacket
|
|
Harshell Trekking Pants
|
2 pants
|
|
Footwear
|
Trekking Boots
|
1 pair
|
|
Slippers/Sandals
|
1 pair
|
|
Trekking Socks
|
5 to 6 pairs (3 pairs if you plan on washing and rewearing)
|
|
Warm Layers
|
Gloves
|
1 pair
|
|
Gaiters (Neck and Legs)
|
1 neck gaiter (optional), 1 pair of leg gaiters
|
|
Balaclava (Optional)
|
1
|
|
Snacks
|
Granola Bars
|
8 to 10 bars
|
|
Trail Mix (Packet)
|
1 packet of about 500 gm
|
|
Ready-to-eat Noodles
|
3 packets
|
Table 2.1: Packing list of clothing, footwear, additional warm layers, and snacks for trek duration of 5 to 6 days.
Make sure to carry some packets of electrolytes per individual. If you have checked with the locals regarding the weather prior to the trek and if it is warm, you can leave out a heavy down jacket from your packing list.
Similarly, you can carry lesser pairs of trekking socks and undergarments if you plan on washing and rewearing them.
7 to 9 Day Treks

If you are going on a trek for a longer duration, then your packing list grows. Same items, more numbers.
The table provided below is for treks like Helambu Circuit and extended treks that are made by combining two different itineraries like Langtang Valley-Gosainkunda Trek, Langtang Valley with Langshisa Kharka, or Langtang Valley with Yala Peak.
|
Categories
|
Items
|
Number of Items
|
|
Base Layers
|
Thermals
|
1 or 2 pairs (top and bottom)
|
|
Undergarments
|
7 to 9 pairs (exact days of the trek, lesser if you are washing and rewearing)
|
|
Lightweight Tops
|
4 or 5 tops
|
|
Mid Layers
|
Fleece Jacket
|
1 or 2 jackets
|
|
Lightweight Down Jacket
|
1 or 2 jackets
|
|
Trekking Pants
|
1 - 3 pants
|
|
Outer Layers
|
Hardshell Jacket
|
2 jackets
|
|
Heavy Down Jacket
|
1 jacket
|
|
Harshell Trekking Pants
|
1 or 2 pants
|
|
Footwear
|
Trekking Boots
|
1 pair
|
|
Slippers/Sandals
|
1 pair
|
|
Trekking Socks
|
7 to 9 pairs (3 or 4 pairs if you plan on washing and rewearing)
|
|
Warm Layers
|
Gloves
|
1 pair
|
|
Gaiters (Neck and Legs)
|
1 neck gaiter (optional), 1 pair of leg gaiters
|
|
Balaclava (Optional)
|
1
|
|
Snacks
|
Granola Bars
|
10 to 14 bars
|
|
Trail Mix
|
Packet(s) of total 700 to 900 gm
|
|
Ready-to-eat Noodles
|
6 - 7 packets
|
Table 2.2: Packing list of clothing, footwear, additional warm layers, and snacks for a trek duration of 7 to 9 days.
Although the list increases, given the trail difficulty and circumstances, you will most probably be going with a guide and a porter. However, each porter will carry a maximum of 20 kg of baggage for two people of the group.
So if your bag’s weight exceeds the given amount, either you will be carrying the excess weight or you will have to hire another porter. Remember, ethical hiring is a reflection of your morals.
10 to 14 Day Treks
Spending 10 to 14 days on a trek is a long time, and it is reasonable if you are going for the Jugal Himal Trek or a combined trek of Langtang Valley and Tamang Heritage Trail. In this case, this is how your packing list is going to look like:
|
Categories
|
Items
|
Number of Items
|
|
Base Layers
|
Thermals
|
2 or 3 pairs (top and bottom)
|
|
Undergarments
|
10 to 14 pairs (exact days of the trek, lesser if you are washing and rewearing)
|
|
Lightweight Tops
|
6 tops
|
|
Mid Layers
|
Fleece Jacket
|
1 or 2 jackets
|
|
Lightweight Down Jacket
|
2 jackets
|
|
Trekking Pants
|
2 or 3 pants
|
|
Outer Layers
|
Hardshell Jacket
|
1 jacket
|
|
Heavy Down Jacket
|
1 jacket
|
|
Harshell Trekking Pants
|
2 or 3 pants
|
|
Footwear
|
Trekking Boots
|
1 pair
|
|
Slippers/Sandals
|
1 pair
|
|
Trekking Socks
|
10 to 14 pairs (5 or 6 pairs if you plan on washing and rewearing)
|
|
Warm Layers
|
Gloves
|
1 pair
|
|
Gaiters (Neck and Legs)
|
1 neck gaiter (optional), 1 pair of leg gaiters
|
|
Balaclava (Optional)
|
1
|
|
Snacks
|
Granola Bars
|
15 to 20 bars
|
|
Trail Mix
|
About 800 grams (you can carry other snacks instead of increasing the amount of trail mix)
|
|
Ready-to-eat Noodles
|
8 packets or more
|
Table 2.2: Packing list of clothing, footwear, additional warm layers, and snacks for trek duration of 10 to 14 days.
Note: Hiring of porters applies to this sub-section as well. Additionally, if you are going during a warm season, then you can definitely deduct a few items. Laundry services are not available, and you will have to wash the clothes by hand and let them dry in the open air.
And don’t forget, extra days mean an additional number of batteries for your camera and headlamps/torches.
Things You Don’t Need to Carry on the Trek
Here are a few items that you will not be needing at all while trekking.
- Denim and Cotton: Any clothing that is not activewear does not belong in your trekking bag. Cotton absorbs sweat, so unless you plan on doing some photoshoots and content creation, don’t carry it. Denim is heavy; don’t burden yourself or the porter with its weight.
- Full-sized toiletries: Instead of carrying an entire bottle of shampoo and bodywash, just get sachets. As for your moisturizers and sunscreens, you can go for a 2 in 1 product, also carry them in a travel-sized container. Saves space and reduces the weight.
- Extra lenses for camera: If you are going there for photography purposes, don’t carry all sorts of camera lenses. Instead, go for a multifaceted lens that serves your purpose. Especially if you are a beginner, you will need to focus on balance and preserving your energy.
- A heavy sleeping bag: Unless you are going for an expedition or camping, you don’t need to carry a heavy sleeping bag. A liner should be enough if you are going on a commercial trail where you will be hopping from one teahouse to another.
- Bluetooth Speakers: At the entry point, your bags will be checked by the army officials for weapons and heavy electronic items that need a permit. If they find a bluetooth speaker, they will confiscate it. Langtang National Park is a safe space for various endangered species, you are not allowed to create noise and disturb their home. Carry your TWS noise-canceling earbuds instead.
- Heavy weapons: Finding a civilian or a trekker with arms and explosives is quite rare in Nepal, but even a large knife is not allowed in National Parks and Conservation Areas. Because of poaching and smuggling, army personnel are extra observant regarding these matters. Instead, you can carry a small pocket knife for utility purposes.
- Running shoes or sneakers: You won’t be needing them. Stick to your trekking boots and sandals. Extra weight is going to exhaust you early. And if you have a new pair of trekking boots, break them in to reduce the risk of blisters.
Basically, don’t carry anything you won’t be needing. Even if you are into journaling, trade your hardcover notebook for a small spiral notebook. Once you start walking, only then will you realise what this means.
Seasonal Packing Guide for Langtang
While the ideal packing list remains the same, you can make some changes in the items while you pack based on the season.
Here is how you can make changes in your list according to the seasons.
Spring (March to May)
Spring is one of the best seasons for trekking, not just in Langtang but all over Nepal. While lower altitude regions like Syabrubesi and Timbu see temperatures ranging between 14℃ to 28℃, higher altitude regions like Kyanjin Gompa and Gosainkunda have temperatures as low as -11℃ at nighttime and as high as 13℃ in the daytime.
Based on this information, you can certainly make some modifications in your packing list that suit the temperature of different altitudes you will have to trek across:
- Since it is warmer in lower regions yet cold in the higher regions, make sure to carry both half-sleeve and full-sleeve lightweight tops.
- Carry trekking pants that are convertible so that you can just zip the lower part if it gets warm in the lower regions.
- If you don’t want to carry a set of thermals, you can replace it with lightweight merino wool leggings to wear while sleeping.
- Make sure to carry your cap or a hat and a woolen or fleece beanie if you are trekking in the early spring.
- Carry a light raincoat, as the higher altitude regions are known for light rain and snowfall in early spring. While snow might not be as prevalent in the lower Helambu Circuit, rain is still a factor to be considered.
- Lastly, don’t forget to carry gloves. You don’t need heavyweight gloves; just ones that are water resistant with windproof liners will be enough. Your gloves are more likely to be used in regions like Kyanjin Gompa, Tatopani, Gosainkunda, and Panch Pokhari Viewpoint.
Summer (June to August)
To be honest, summer is not the most ideal season for trekking in Langtang because of its fragile landscape. Summer usually comes with rain, increasing the chances of landslides and flooding in trails like Gosainkunda and Langtang Valley.
However, adrenaline junkies have never been challenged by such possibilities, and if you are one of them, here are some changes you can make in your items on the packing list:
- When packing your lightweight tops, carry a mix of half-sleeved and full-sleeved tops. Your half-sleeved tops will be used in lower regions, and as you reach higher, you can change into full-sleeved tops.
- Since it’s warm, daytime temperatures are quite mild and humid, while higher regions can see temperatures as low as 7℃ in the night time. So instead of carrying two different jackets for mid layers, you can either carry a lightweight fleece jacket or a well-insulated lightweight down jacket. Just make sure to carry proper outer layer jackets to keep you warm in higher-altitude regions.
- Convertible trekking pants are a good choice for summer as well. Otherwise, you can also carry an extra pair of shorts for your first day of trek when you start from a warmer region.
- Since rain is frequent, your trekking socks need to be made of quick-dry material. And make sure to carry leg gaiters, as they will protect your legs from leeches and prevent wet mud from entering your shoes.
- Lastly, summer demands that you bring out your best rain gear. This means a waterproof jacket and trousers to wear over your trekking outfit. Make sure that they are lightweight and can be packed easily. It’s okay if they do not include insulation; you can layer them over your fleece jackets and insulated trekking pants or leggings.
- And don’t forget to carry a rain cover for your bag as well as extra ziplocs. You will need them to keep your undergarments, snacks, and electronics dry in case of heavy rain.
- Don’t forget to book your accommodations early, as many teahouses might be closed during monsoon months, as it is considered to be the off-season of trekking.
Autumn (September to Mid-November)
If blooming rhododendrons pave your trails in spring, then autumn welcomes you with the clearest view of the ranges of Langtang. And with the change in season, you will have to make a few adjustments in your packing items.
The weather cools down, but you might still face rainfall, but as usual, you can never be sure about the weather in the mountains. If you want to be completely prepared, then this is how you can adapt with your packing list:
- For tops, one lightweight half sleeve top will do. The rest need to be midweight, full-sleeved tops. Because in most of the trails, you will cross the lower range on your first day. Furthermore, nights can still get chilly even in the lower ranges.
- For your trekking pants, pick those that are windproof. The wind might be as harsh in early autumn, but the speed starts picking up once October starts. Shorts are not necessary for autumn.
- You will need to pack a midweight fleece jacket (200 gsm). If you have a lightweight fleece jacket, then you will have to pair it with a midweight down jacket weighing about 300 gsm. Make sure that your down jacket is also windproof.
- Hardshell jackets and pants are non-negotiable. Especially after mid-October.
- Carry well-insulated gloves and make sure that they fit you properly.
- You will need neck-gaiters for high-altitude trekking.
Winter (Late November - February)
Winter is another off-season for trekking. The temperature drops below freezing and that is the case throughout most of the days. Apart from the drop in temperature, there are many reasons why trekkers are suggested not to trek in the winter.
Heavy snowfall can lead to closure of trails, especially for high-altitude passes like Ganja La Pass (5,180m) and Tilman Pass (5,350m). There are greater chances of hypothermia among trekkers, and finding an accommodation can be a hassle.
But if you still want to go on a trek despite the risks, here is how you can pack for the weather:
- All tops need to be heavyweight (200/+ gsm). Try finding ones with thumbholes so that your palm stays warm even without gloves.
- Additionally, your thermals must also be heavyweight, designed especially for sub-zero conditions.
- Apart from thermals, carry a pair of lightweight leggings that you can wear inside your trekking pants that are windproof as well as waterproof. If your trekking pants have fleece linings in the inside, make sure your leggings are moisture wicking because you do not want to feel clammy while trekking.
- Instead of a lightweight neck gaiter, you will need to get a fleece buff or fleece balaclava. They protect your face and neck from the sun while keeping them warm.
- Get waterproof gloves with heavy insulation. Ask the vendor to give you gloves with shells of either GoreTex layer, or a mix of nylon, merino wool, and polyamide or a Pertex shield.
- Carry heavyweight trekking socks to keep your feet warm while walking in snow, and don’t forget to carry your leg gaiters. They will stop the snow from entering your shoes.
As you can see, the items you need to pack are generally the same no matter what season. However, the length of the clothing and the number of clothing items might differ according to the season. Stay prepared and do your health a favor!
Trekking With a Porter
Porters play a major role in Nepal’s trekking scene. They are one of the main reasons why trekking has been accessible for beginners.
Travelling with a porter is strongly advised if you are a beginner, if you are going on a trek for a long duration, or if you are going on a trail that requires camping.
Porters for Beginners
When you are a beginner, walking uphill won’t be the only new experience for you. While you might be able to overcome that challenge, walking uphill with a trekking bag containing all your belongings is going to be the main challenge.
Since it will be your first time trekking, your body will be new to the environment, making you more likely to get exhausted sooner. Furthermore, as you are required to maintain balance and your knees go through immense pressure, it would be much easier for you to trek with a porter.
With their help, you can shift your focus on the trail instead. You will not only be able to save your energy, but porters used to the trail also know better about shortcuts and beginner-friendly routes. As they handle the tough part of the trekking, you can take your time to enjoy the beauty that surrounds you.
Porters for Long Duration Treks
And in case you are not a beginner but you are going on a long trek lasting more than 8 days, then you should get a porter.
It is a known fact that longer duration directly adds to the difficulty level of the trails as your body goes through physical stress for a longer period of time. On the first few days, you might feel okay with the ascent. But as you climb higher, your body will demand more energy.
By the third day, you will have already reached a significantly higher altitude. With your porter carrying the load, you will have more strength to acclimatize to the altitude. But acclimatization is not enough.
After the fifth day of trekking without a porter, your body will demand rest. While carrying a trekking bag, even if it is only about 15 kg, over a stretch of time, your body, especially your knees and your ankles, will start showing the negative effects of physical strain.
So if you are trekking for longer than a week, don’t push your body beyond its limits if you are covering a long itinerary for the first time. Let the experts handle the stress while you focus on achieving your goal in perfect health.
Porters While Camping
If you are going on treks like the Jugal Himal Base Camp and Yala Peak Base Camp or Summit that require you to rely completely on a camping setup, then according to the rules and the circumstances, it is mandatory that you take porters along with you.
Unlike regular campsites that are accessible by vehicles, camping while trekking requires more manpower. Because carrying all the essentials and camping equipment on your own is not possible when you have to navigate the steep, rugged terrains.
And if you are taking a certain trail for the first time, it won’t be easy for you to understand the change in trail conditions and predict the weather changes in the route. Apart from essentials like tents and sleeping bags, you will already be carrying your own stuff like clothing and trekking gears.
But in the isolated trails, you cannot rely on teahouses for food because they simply don’t exist. This means you will also have to carry portable stoves, fuel, basic cooking utensils, cutleries, and, not to mention, the ingredients.
Basically, the weight of an individual’s camping requirements will easily weigh more than 20 kg. And carrying such weight for multiple days will not only affect one’s physical conditions, but it will also affect their acclimatization process.
In conclusion, the wisest decision when it comes to camping in regions like Jugal Himal and Yala Base Camp is to hire a porter. You will not only be helping yourself, but you will also be helping the local economy.
How Can Hiring a Porter Make Any Difference?
Just because you are hiring a porter does not mean that the weight is completely off your back. But having a porter can certainly make it all feel less stressful.
In general, a porter is shared between 2 individuals. The standard weight a porter carries is 25 kg, but this weight also includes the weight of his own belongings. Let’s say his belongings weigh about 5 kg.
This means that he can carry about 20 kg extra. So if you are hiring a porter for 2 people, then from each person’s 15 kg (approx.), he can carry about 8 to 10 kg. It does not mean that the porter should take up the entire 10 kg weight from each individual.
This leaves you and your trekking partner with approx. 5 to 7 kg each. But reduced weight is not the only benefit you receive from hiring a porter. Here is how porters can make the trek easier for you:
- One of the greatest qualities that porters have that you don't is their genetics. They have grown up in the high altitude regions, and their daily lives included climbing up and down the steep hills multiple times on a daily basis.
So when you give the porter your share of the weight, as long as it falls under the standard weight, you are not really troubling them. When they take the load from your back, they are also taking the strain off of your knees.
- Hiring a porter also reduces your chances of injuries and falls during the trek. The porters know how to carry the weight and where the weight should fall on their bodies.
When you are carrying the entire weight by yourself, your focus will be divided across numerous things. Maintaining balance, staying hydrated, looking at your surroundings, and so on.
So when a porter enters the scene, they will look after the weight, and all you have to do is look where you step on.
- While trekking, your muscle recovery takes time. So if you don’t rest well, the exhaustion will gather over time, and by the time the trek comes to an end, you will most likely feel lifeless.
So when a porter comes to help from the very first day, the cumulative fatigue you feel by the end of the trek won’t be as much. This won’t make the trek feel like a nightmare, allowing you to remember the brighter memories.
- Hiring a porter also means being able to walk at your natural pace. When you don’t have a huge weight dragging you down, you will be able to walk with more ease, and you won’t fall back on your itinerary unless the unpredictable weather is involved.
- The benefits of trekking with a porter are not limited to carrying less weight. Porters also come with benefits like finding accommodations if you don’t have a guide with you.
If you see the dining areas of teahouses, you will notice that porters are provided accommodation in the dining halls. All porters sleep in the same room and are closer to the hosts. This implies that they have larger networks with other porters and teahouses.
- A well-experienced porter is better than any map, compass, and weather forecast app. With a heavier weight on their back, they are always alert for loose terrains, changing weather, and possible disasters.
- If you have trekked before, you might have noticed that most of the time, porters are on their own and the trekking group is either ahead of or behind the porter. This is because porters know the trail like the back of their hands.
They know shortcuts that people cannot even imagine in the trails. They might be behind their group for some time, but within a half an hour’s time, they will be ahead of everyone resting on top of a rock.
- Almost always, porters are a part of the indigenous community of the region. In the Langtang region, most of the porters will typically be the Tamangs of the region. They might not have the best English, but they do know just enough to converse with you.
So when trekking with a porter, be assured that they will show you various cultural aspects of the region. They might not be able to explain it in detail, but you will be able to learn through their actions if you observe deeply.
If you are trekking with a porter, these are some of the benefits that you can expect from their company. And don’t forget to request your porter to sing some local songs, because one thing is for certain, they never miss a chance to entertain their guests!
Ethical Hiring of Porters
Despite being one of the most valued personnel of the trekking industry in Nepal, porters are often overworked and under-compensated. So how can you contribute to ethical practices?
Here are a few things that you can do before you hire a porter:
- If you are hiring them through a trekking agency, which is often the case, then you need to ensure that they have medical insurance provided by the agency. Although they are used to the work and the weight, you never know when emergencies can strike.
- Since they only carry a load of 5 kg for their personal belongings, it is not likely that they will have a first aid kit with them. So make sure that you have yours with sufficient medical supplies.
- Always check if the porters have the right gear for the weather. While most of the porters are used to walking the trail in slippers, in extreme weather conditions, gears are a must. Make sure that the trekking agency provides them with proper jackets and footwear if they are going on high-altitude passes of the Langtang region.
- Do not disrespect them. Yes, your trekkers might not be fluent in English or other languages other than Nepali, but neither are you an expert in carrying heavy objects in the steep terrains. So always make sure to be respectful of their services. Misunderstandings are likely to arise even among the closest of friends during a trip, so if that happens with your porter, don’t forget to treat them like humans.
- You might be tempted to hire a porter from the local areas, as they do offer services at a cheaper rate. But avoid doing that. Always hire porters through a licensed trekking agency. These agencies ensure that they provide you with an experienced porter and also provide them with fair pay. You will be guaranteed the safety of your goods and their company till the trek ends.
- Tip them! Yes, the agency pays them for their services. But if you can tip someone who serves you meals at the restaurant, tipping someone who drains themselves to make your adventure easier is not like they are asking for much.
Note: In trekking regions across Nepal, it’s best to allocate around 10% of your overall budget to tip your guide, porter, and driver. Not a compulsion, just a part of the trekking culture!
What If I Want to Trek Independently?
If you want to trek independently, then the first thing you need to consider while choosing a trail is the difficulty of the trail. Langtang Region definitely has beginner-friendly trails, and if you are a beginner, then you can pick one of them for your first trek.
But then you have a second factor to consider. No matter how beginner friendly a trek is, completion depends on your physical conditions as well.
Because even if the Langtang routes are easy, you will have to walk for about 5 to 7 hours each day, putting your endurance to test. This is why we always put emphasis on physical preparation months before the trek begins.
And then we have the third thing to consider, the weight of your trekking bag. Because if you have made up your mind on trekking without a porter, you need to grasp the fact that you are completely responsible for the weight that you pack.
In that case, you need to follow the smart packing tips that will be covered in the next section.
Smart Packing Hacks: Tips From a Professional Guide!
Unlike other blogs where our tips are consolidated into a single section, in this blog, the tips get their own sections. Why? Because we have seen trekkers suffer on the trail with countless mistakes they make, from the things they pack to the way they pack their things.
Packing Mistakes that Trekkers Make You Should Avoid
- Don’t think about too many scenarios. Overthinking before the trek leads to overpacking. Even if your trek gets extended by buffer days, the days probably won’t extend any longer than 4 days at max.
- Stick to layering no matter what! Don’t try to outsmart others by packing a bulky clothing item trying to replace your layers. That won’t work. With changing altitude and temperature, you might have to peel a layer of clothing or add one.
- Trekkers often forget to weigh their bag before they start the trek. This is something you need to do before you leave for your trek. After you are done packing your bag, weigh it once, and see if you have to deduct a few items.
- While staying at a teahouse, do not unpack everything from your bag. Take out what’s necessary, and leave the rest of the items right where they are.
- Once you take out your change of clothes for the night, pack everything for the next morning. You will have to resume your trek early in the morning, and trust me, you do not want to rush with packing at that hour.
- For each medicine you pack, learn how to use them, their right dose, and their timings. Medications won’t work unless you prepare your body. Some medications are meant to be taken after a meal; others are meant to be taken on an empty stomach. So sit down with a doctor before you go on filling your first aid kit with medications you have no idea about.
- Don’t pack duplicates. If the list has said one hardshell jacket, then one hardshell jacket it is. Nothing more, nothing less. Overpacking will only leave you over exhausted.
How To Find Out the Right Weight for Your Trekking Bag?
The answer to this is pretty simple. The weight of your trekking bag should be between 10% - 15% of your weight. And if you are physically fit and an experienced trekker, then you can go for 20% of your weight.
Even if you have hired a porter, make sure to carry a daypack with about 5 kg of essentials (like water, layers, and a first-aid kit) on your back. Apart from the ethics of not overloading your porter, carrying your own essentials ensures you are always prepared if you get separated on the trail.
How to Pack Your Trekking Bag?
When you distribute the weight correctly on your bag, you distribute the weight correctly on your body.
Additionally, you might have also seen a few trekkers on the trail who have items poking certain parts of the bag. Don’t be that trekker. Learn how to pack your bag efficiently.
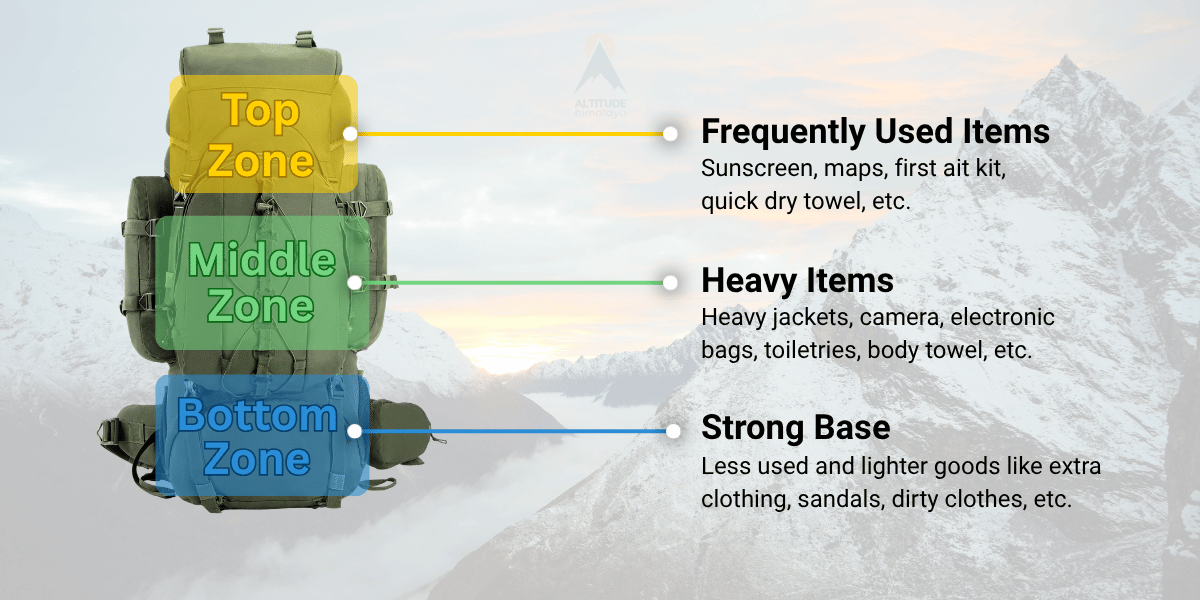
If clothing requires layering, so does packing. A typical trekking bag has three sections: the bottom zone, the middle zone, and the top zone. Different things go in different zones. Allow me to explain:
- Bottom Zone: Your bottom zone should have the lightest items but the biggest items. For instance, your sleeping bag or liner and your down jackets. Anything compressible goes in this zone. These are also the items that you won’t be needing until you reach the teahouse. Things that need to be accessed while trekking should never be packed in the bottom zone.
- Middle Zone: All the heavy items go in this zone. Your heavyweight spare clothes, cooking items like a stove (if any), and gear that won’t be used for the day. This is because the heavy weight should be placed on your hips.
- Top Zone: All the remaining lightweight items should be placed in the top zone. These are also clothes like your fleece jacket, rain gear, electrolytes, snacks for the day, and your first aid kit.
Most of the trekking bags are designed like top-loading bags. Once you pull the string, you need to close the bag with a flap that is known as the “brain" or "floating lid”. You can also carry your essentials like granola bars, sunscreen, headlamps, and maps in that section.
And don’t forget to keep your water bottles in the side pocket. I also carried my extra trekking pole in the side pocket so that I could access it easily whenever I needed it.
Any guesses on how this answers the question of the last section? When you place the heaviest items in the middle zone, you are placing all the heavy weight on your hips. As your hips are directly connected to your glutes and your legs, your body will be able to carry the load more efficiently.
But when you place your weight on your shoulders, you will start feeling like it’s dragging you down. When this happens for a prolonged time, you will face severe backache and have difficulty breathing.
Conclusion
If you have made it this far, then you have successfully finished the packing guide for your trek in the Langtang Region. And if there is one lesson that you have missed, it is that when it comes to treks, you do not pack a lot; you pack the right things.
Another lesson to keep in mind is that layering applies for both clothing and packing. Follow the tips, and you will be doing yourself a favor throughout the trek.
Every item you pack needs to be thought through. It should be intentional; otherwise, even a single gram of an unwanted item can contribute to the waste of your energy.
As for hiring companies for your convenience, like porters and pack animals, be kind and be gentle. They are there to make things easy. By helping you, they are doing a favour to your well-being, and by taking their help, you are contributing to their economy.
And to conclude this blog, I will leave you with one last tip. Before you put anything in your bag, ask yourself this one question thrice, “Do I really need this?”
Langtang is one of the most heavenly places the world has to offer, but you will only be able to see it when you leave prepared.


 Suraksha Subba